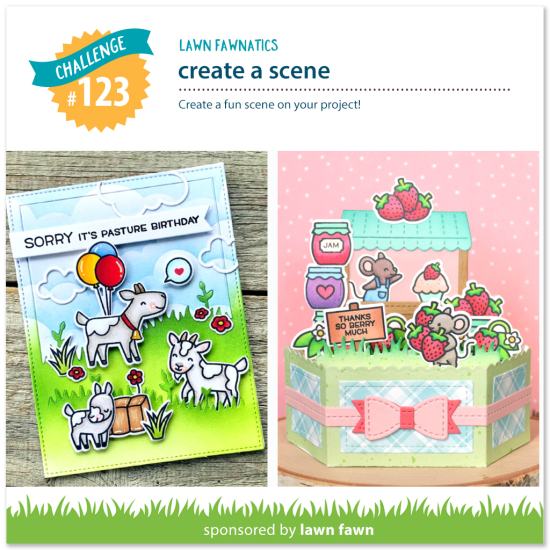
We hope you enjoy today’s inspiration and join us for the Create a Scene challenge! We can’t wait to see your creativity! This challenge will be open until Sunday, May 1 at 11:59PM ET.
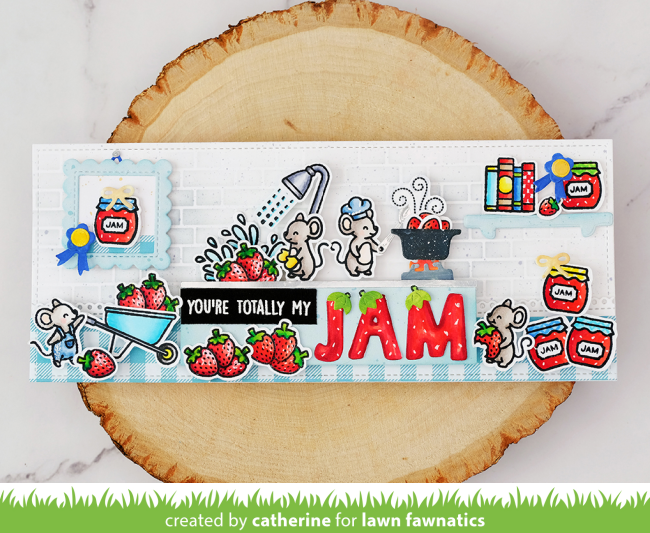
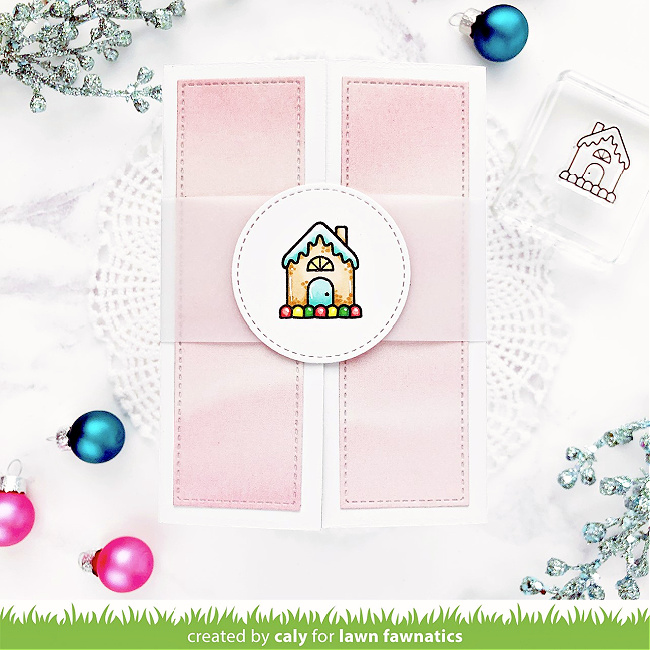
Catherine is so great at creating detailed scenes packed with fun little elements! To create this cute kitchen scene, she used Magic Picture Changer Oven Add-On for the stove top, pot and spoon and she borrowed the shower from Rub-A-Dub-Dub to fill in for the faucet! I love the cute strawberry detail she added to the Quinn’s Capital ABCs greeting!
Be sure to check out the supply list below to see all the sets she combined to create this delightful scene!
Thank you so much, Catherine! Those jam-making mice are just too cute!
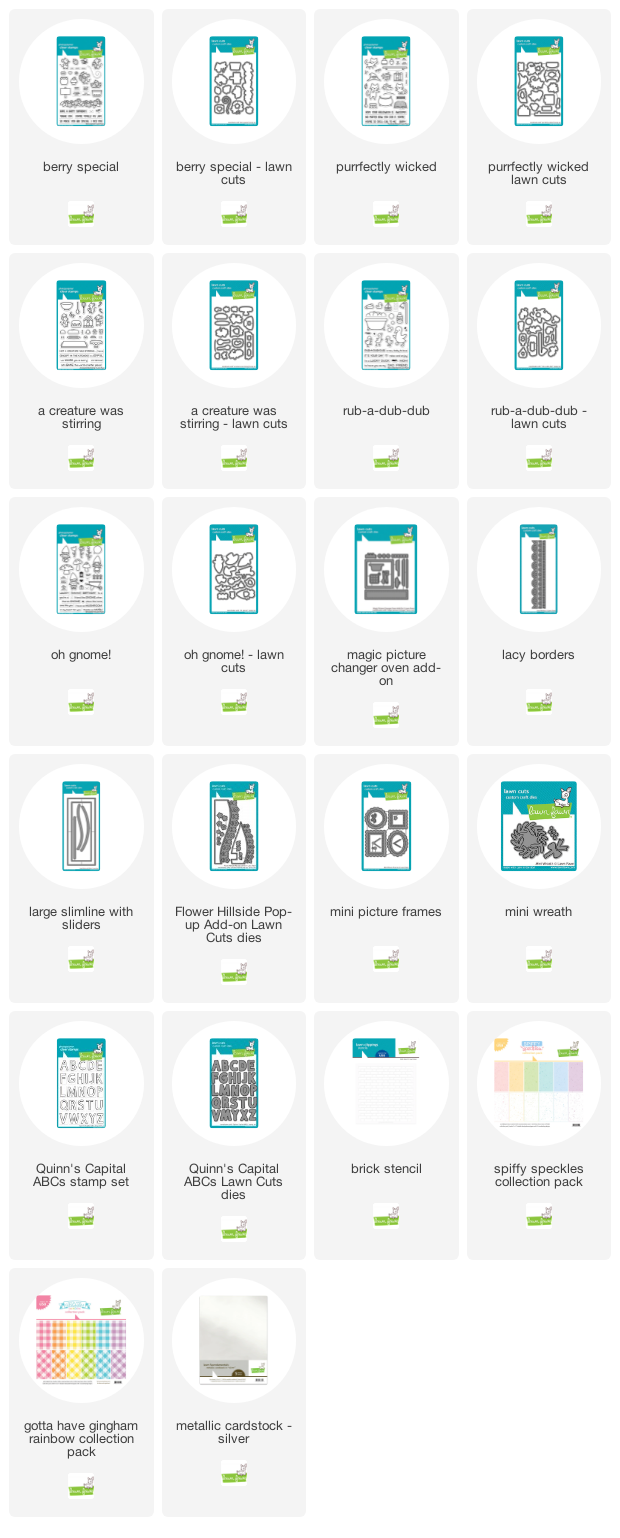
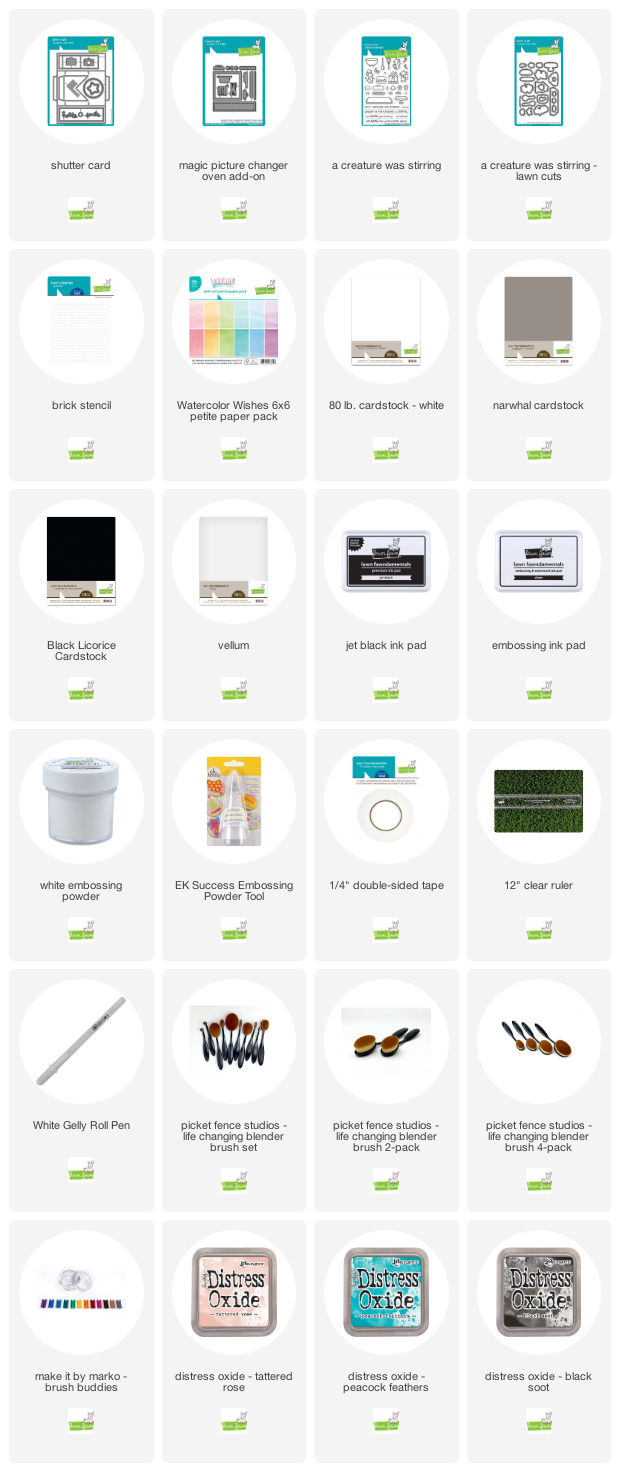
Supplies:
We can’t wait to see how you will be inspired to “Create a Scene”! Click HERE to go to the challenge page!
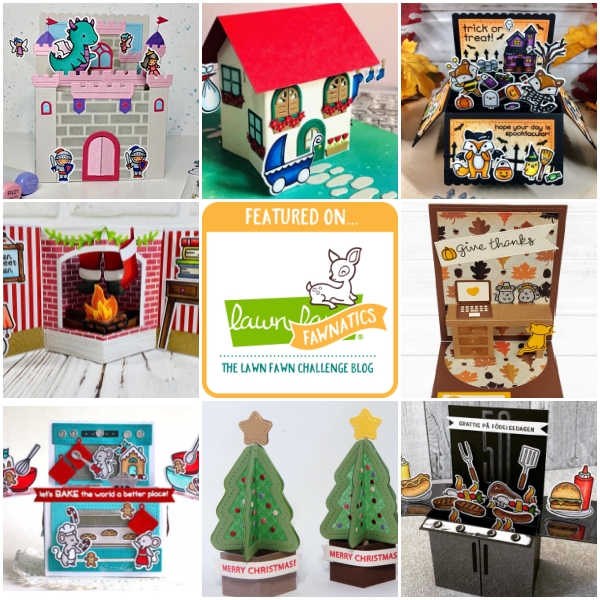
Hi friends! It’s time to show off some of the awesome designs you linked up for the 3D Card challenge! Big thanks to everyone joined us to share your cards with dimension! Please check out the 3D Card challenge gallery to see all the fabulous entries!
If you are one of our Featured Fawnatics today, we invite you to grab this badge to share on your blog or other social sites!
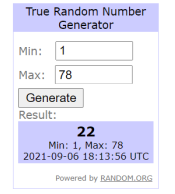
And now we have our random drawing winner from Challenge 107 who wins a $25.00 gift certificate to our shop, lawnfawn.com! And the winner is…#22
Congratulations to Leontine! Please send an email to fawnies(at)lawnfawn(dot)com with “Lawn Fawnatics random winner” in the subject line. Then grab this winner badge to display on your blog and social media!
We will share Design Team inspiration during the next 2 weeks for Challenge 108 – Photo Inspiration. This new challenge runs until Sunday, September 19th at 11:59PM ET. We can’t wait to see how this photo inspires you!
Thank you so much for joining us each month for our Lawn Fawnatics challenges! You inspire us with your amazing creativity and kindness!
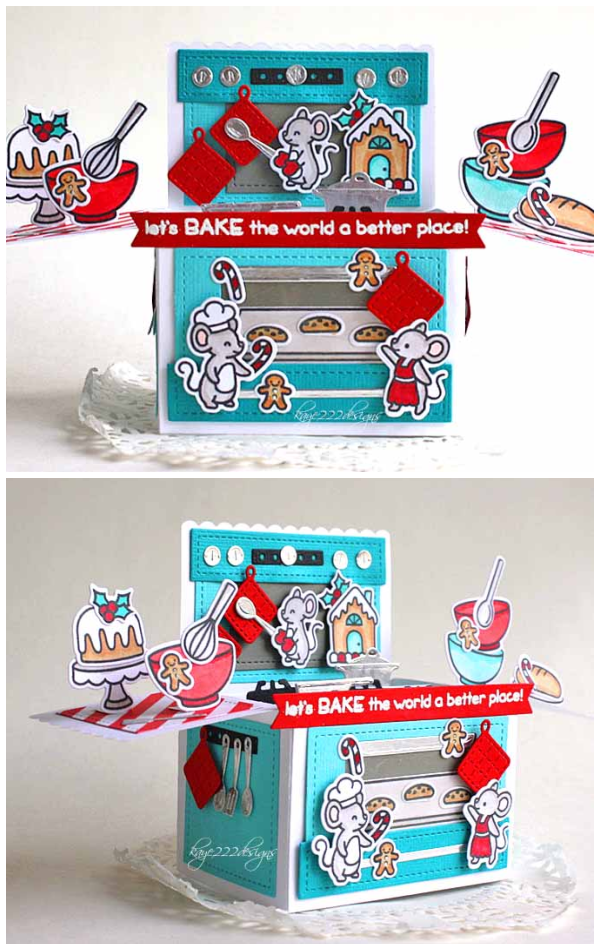
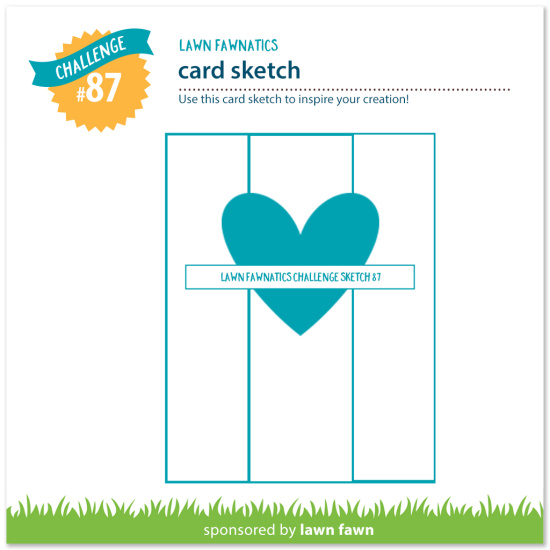
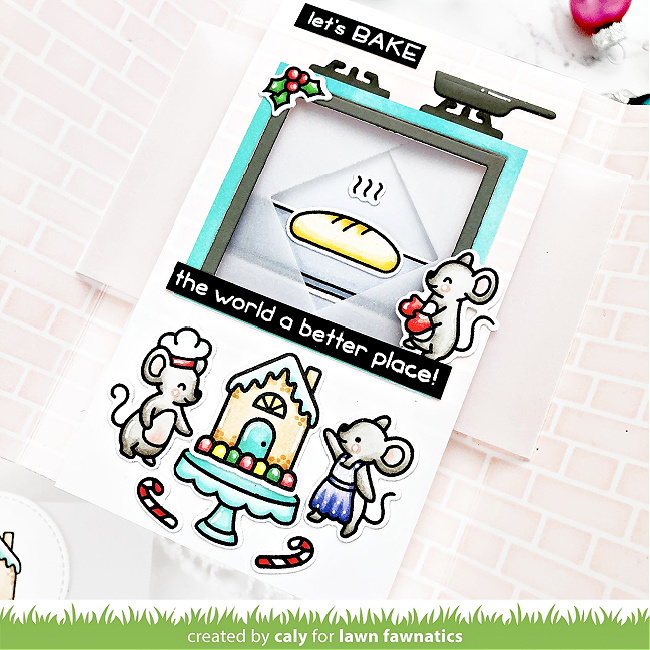
Hi there, Caly here today. I’m excited to share today’s project with you for the Lawn Fawnatics Challenge-87! We’ve got a card sketch and I hope it’s loaded with inspiration for you! There’s still a lot of time to create and join the fun if you haven’t started.
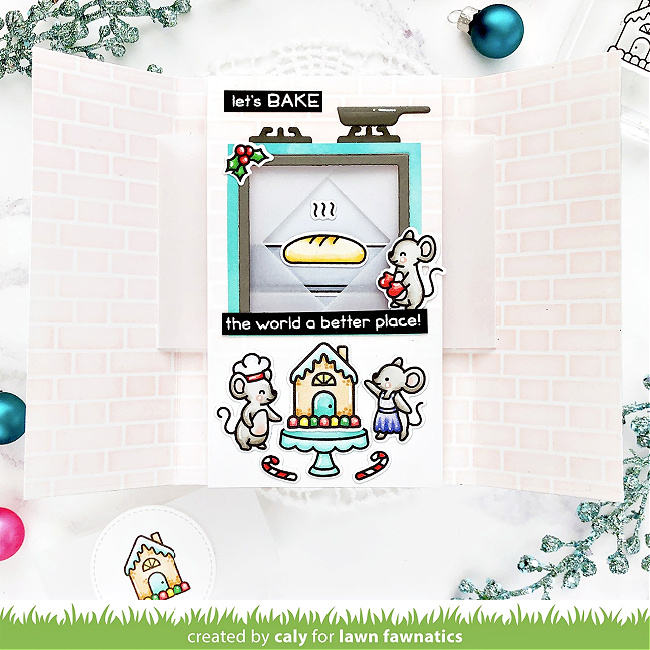
When I saw this sketch, I thought it looked like the inside of a Shutter Card – I think many of you will agree! I wanted the focus to be something different so instead of using a heart element or the circle, I tweaked and played to create an oven using the Magic Picture Changer Oven Add-On.
I started with a piece of cardstock that is large enough to cut out the shutter card base (6” x 8”). Before die-cutting, I stenciled it with the Brick Stencil and Tattered Rose Distress Oxide Ink to prevent harsh ink marks from the score lines. After die-cutting, I burnished the lines and cut out a center panel to ink-blend with the same stencil except I faded to white. To create my window, I used the square die from the Magic Picture Changer Oven Add-On to trace the inner square so I could use a ruler and kraft knife to cut my window. The die cuts the frame for the oven door, which I die-cut in Narwhal cardstock along with the burner and pan. I added some Black Soot Distress Oxide Inks to these to give them a bit of shading too.
I then cut a square using my trimmer slightly bigger than the oven door that I ink-blended with Peacock Feathers Distress Oxide ink. Then I die-cut my shutter panels using vellum. I also reserved a piece of vellum 1 ½” x 8” for a belly band. I adhere nothing together yet because I need to add my image behind the window panel first.
Now to the coloring! I stamped my images from A Creature Was Stirring and colored them with Copic markers. Gingerbread: E30, E33 Bread: YR30, Y23, YR24 Mice: R20, W1, W3, W5 Oven Tray and Background: C0, C1, C3, C5 Reds: R32, R35, R27 Yellows: Y02, Y08 Greens: G14, G17 Teals: BG11, BG34 Purples: BV000, BV01, BV04
Once the images are die-cut, I can start building my scene! The background panel for the oven is a piece of cardstock that I colored with Gray Copic markers. Then I added the pan, bread and steam before attaching that to the card panel behind the window. I adhered the center panel to the tabs at this point and built the rest of my scene. To finish, I attached my sentiment that I embossed in white over black cardstock.
I hope you enjoyed this project!! I’m so glad you’ve stopped by – thank you! The Card Sketch challenge ends on November 1st at 11:59pm PT! I hope you’ll join the fun! Have a wonderful day! –Caly