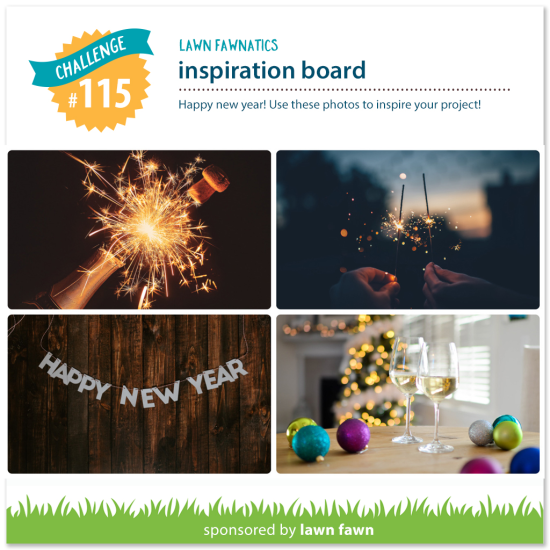
Can you believe that 2022 is less than two weeks away? For this new challenge let’s make projects to welcome the new year using the fabulous photos in our Inspiration Board! Feel free to be creative and use what inspires you, keeping with the Happy New Year theme!
We invite you to share your creativity by linking up your crafty projects at the end of this post! Your project should feature Lawn Fawn stamps, dies and papers. This challenge will run for 2 weeks and be open until Sunday, January 2nd at 11:59PM ET.
For each challenge, we will randomly select an entry to receive a $50.00 gift certificate to the Lawn Fawn shop! We have doubled the prize for our random winners starting with this challenge! Everyone who enters a challenge has an equal chance to be the random drawing winner! Woohoo!
We will also be highlighting a few of your fabulous projects at the close of each challenge! By linking your projects to our challenges, you will give permission for us to post your work to this blog and our social media sites. Check out the How to Play page for a few guidelines to play along. We want this to be FUN, so we’ll keep the rules to just a few!
Let’s see what our amazing Design Team created to inspire us!
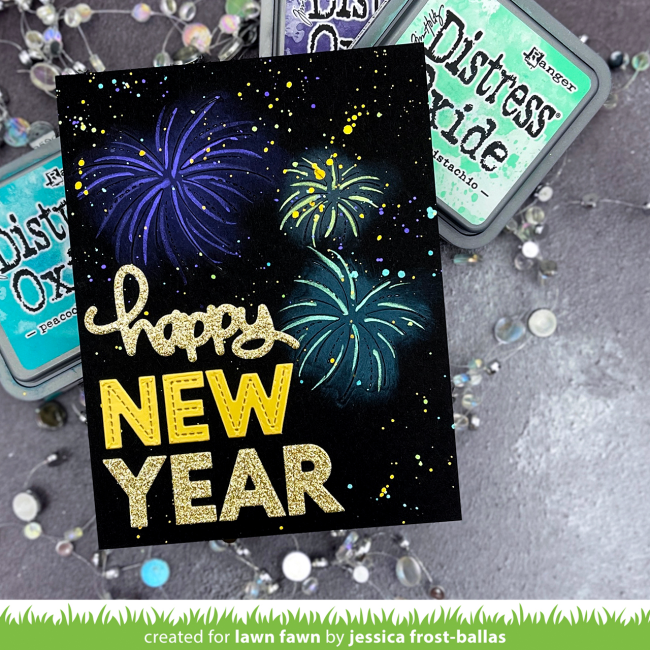
Jessica created a “celebration in a card”! She used Stitched Fireworks with a splash of color which looks amazing on the black background! For the greeting she combined Oliver’s Stitched ABCs with a Happy Happy Happy coordinating die. The glittery gold cardstock makes this design so special!
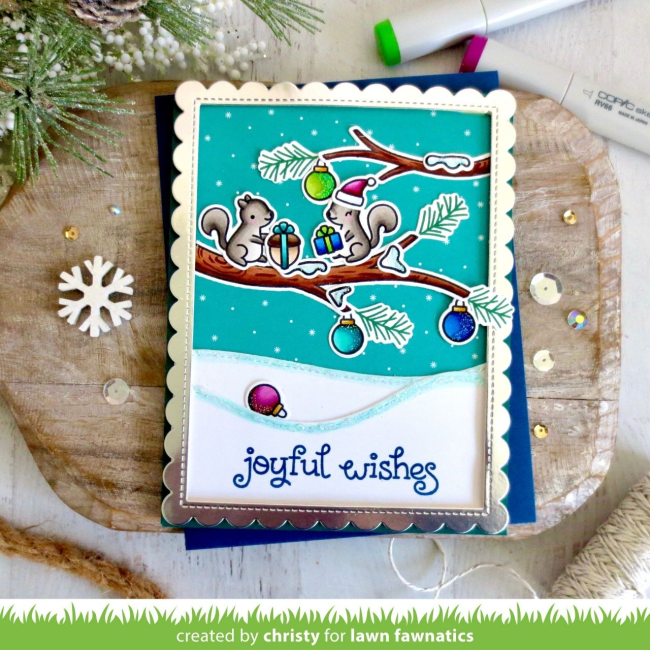
Christy was inspired by the colorful ornaments to create a sweet and joyful woodland holiday scene! Those cute squirrels are found in Cheery Christmas along with the ornaments. She combined branches from A Bug Deal with pine boughs and snow from Frosty Fairy Friends! The beautiful sentiment is from Joy to the Woods!
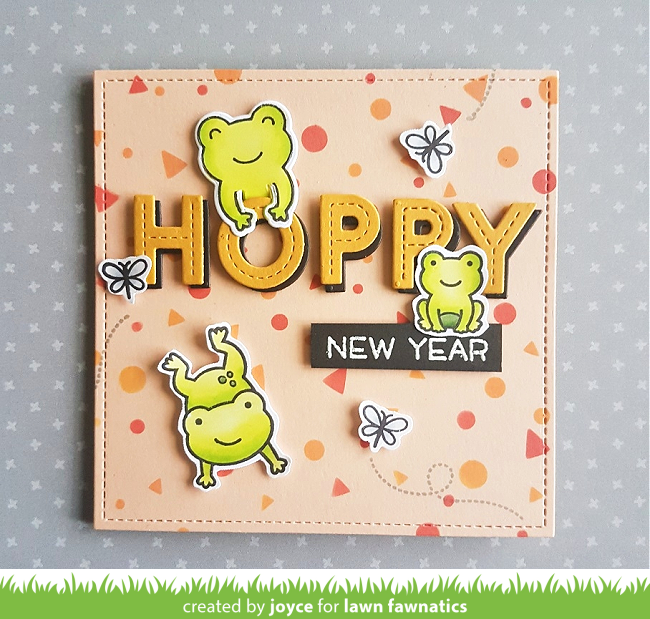
Joyce is welcoming the new year with a super “hoppy” card! She started by stenciling the confetti in the background, then she added those adorable frogs from Toadally Awesome and Don’t Worry, Be Hoppy! For the greeting she combined Oliver’s Stitched ABCs with Happy Happy Happy Add-On!
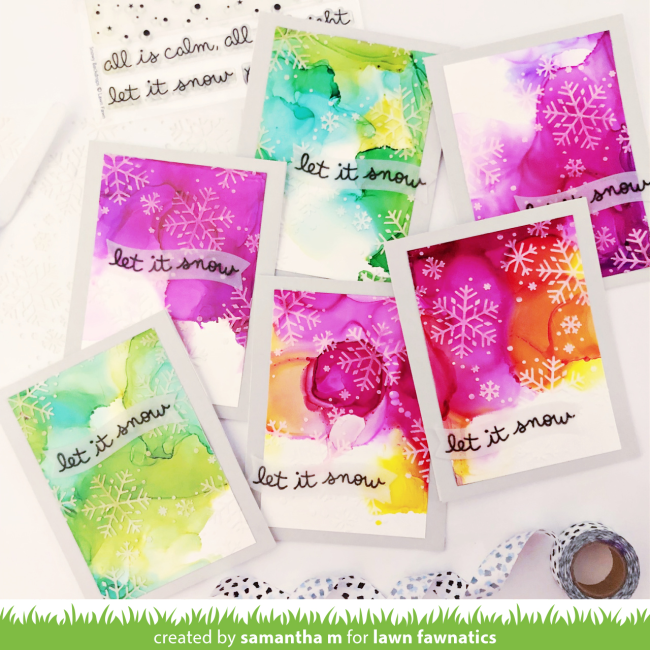
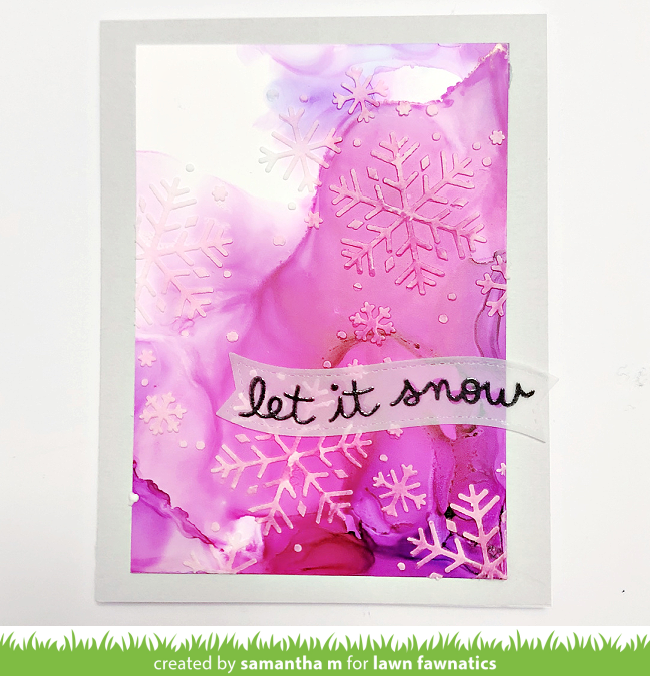
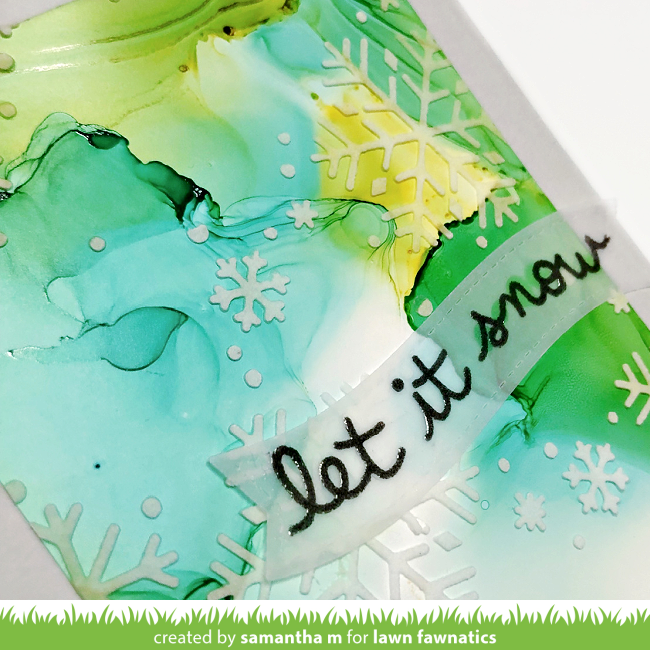
Samantha made the most gorgeous set of cards featuring alcohol inked backgrounds! She added Snowflake Background Stenciled with White Stencil Paste over those beautiful pops of color!
As a finishing touch, Samantha embossed the sentiment from Snowy Backdrops onto a vellum Fancy Wavy Banner!
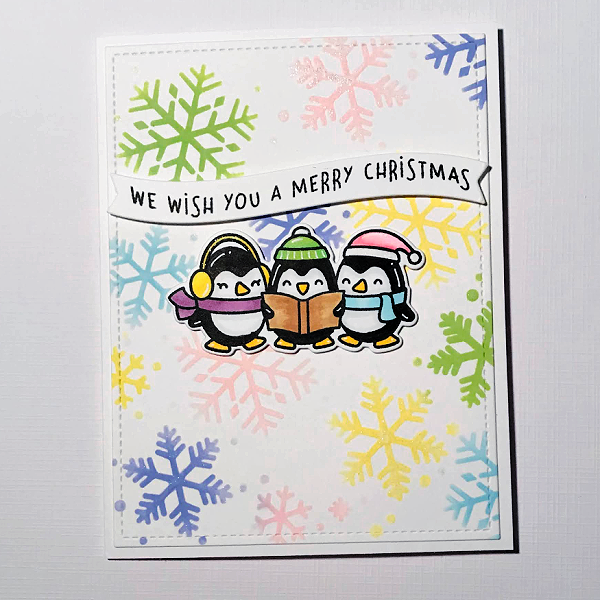
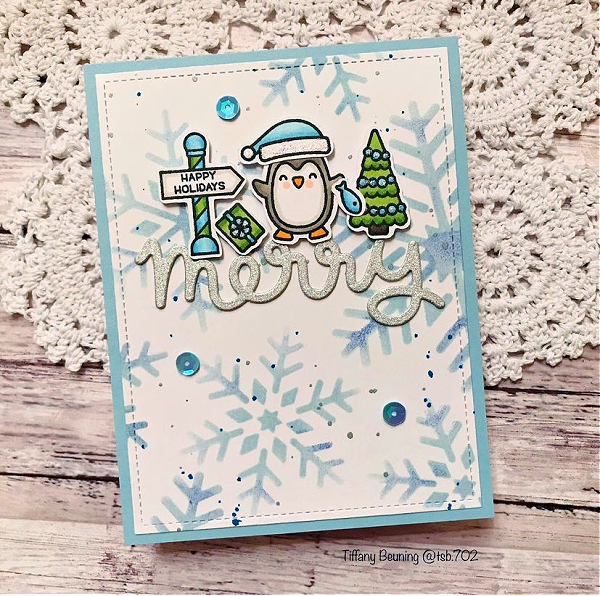
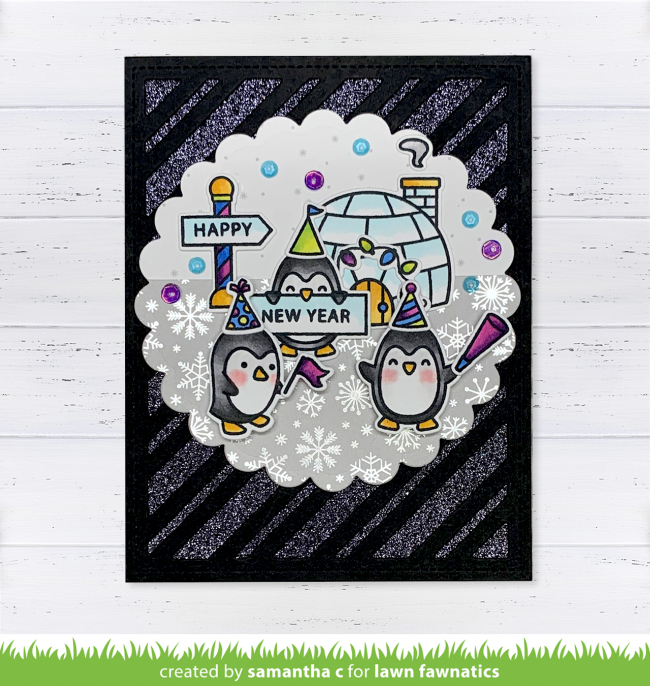
It’s a party on Samantha‘s awesome card! A Penguin Party that is! She used the happy colors from the inspiration photo to add lots of cheer to her Happy New Year card! I love how she layered black cardstock with the sparkle cardstock using Peppermint Stripe Backdrop!
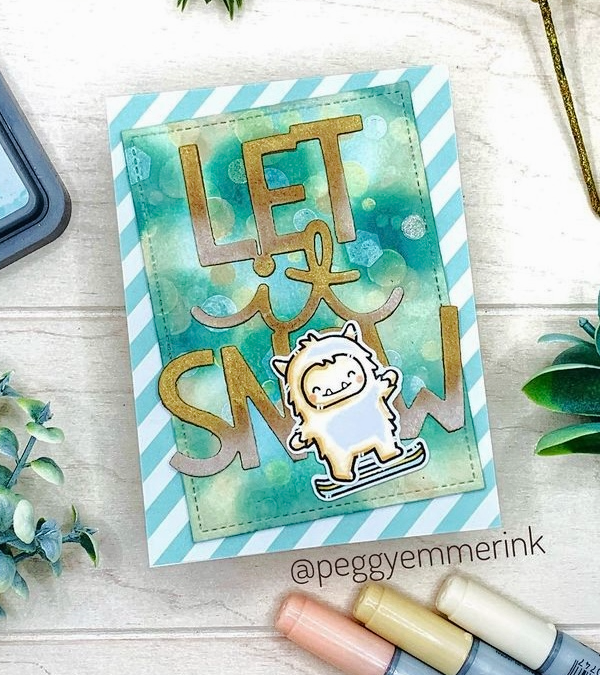
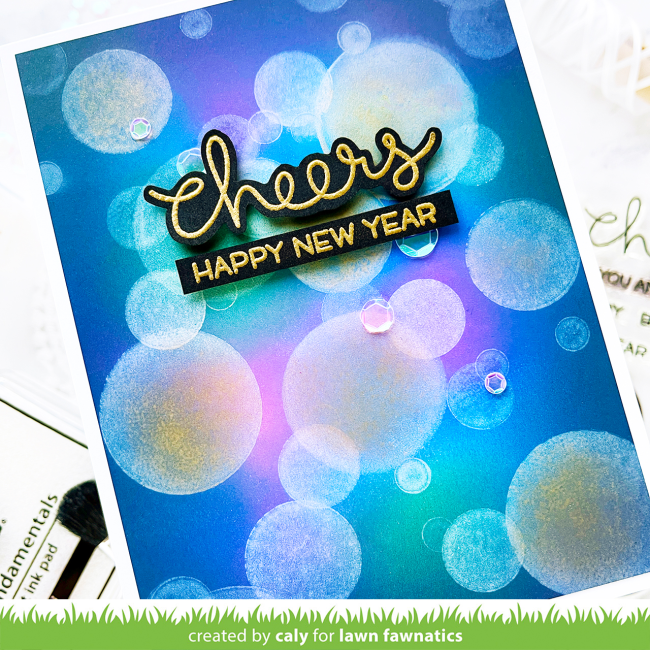
Caly captured the pretty bokeh lights in the inspiration board using the Let’s Bokeh set with Yeti ink! The beautifully inked background shines behind the bubbly bokeh pattern! She gold embossed the sentiment on black cardstock to create a dramatic and festive greeting!
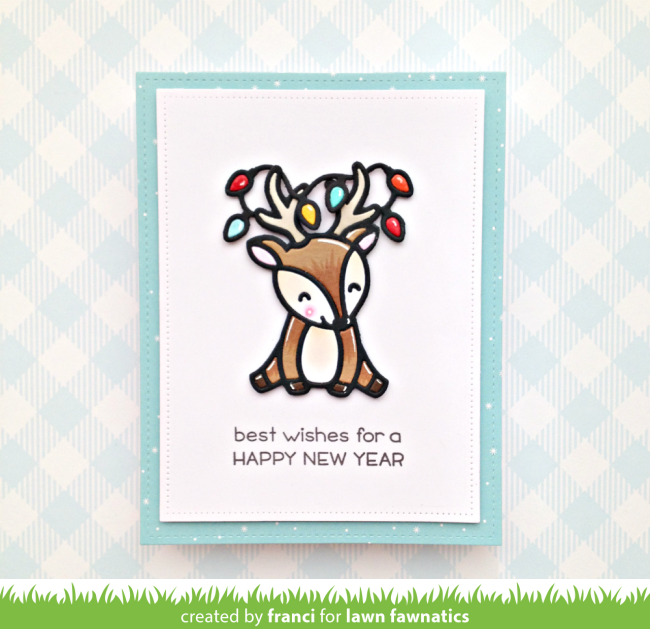
Franci‘s Cheery Deer card is so sweet! It sends Happy New Year wishes with Merry Messages in a clean and simple design!
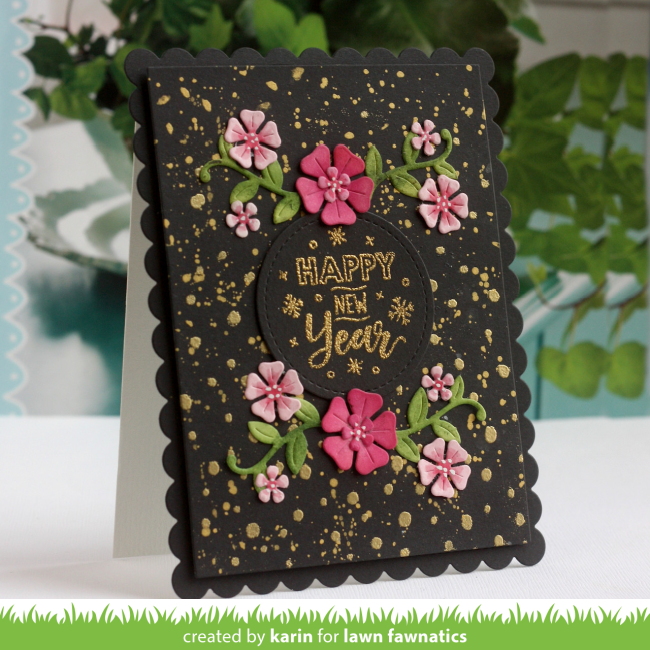
Karin‘s gorgeous design is sure to start the new year off right! The gold splashes on the black background recreate the sparklers in the inspiration board! The sentiment is gold embossed on black; it’s from Magic Holiday Messages! The flowers and vines are combined from Happy Hibiscus and Magic Iris Birdhouse Add-On.
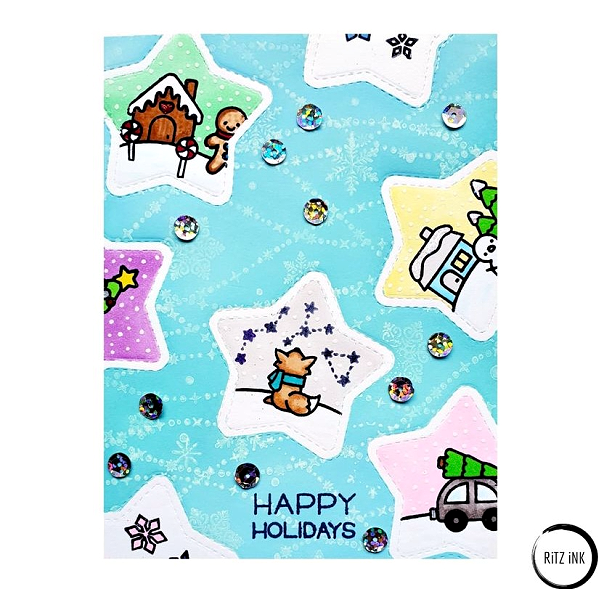
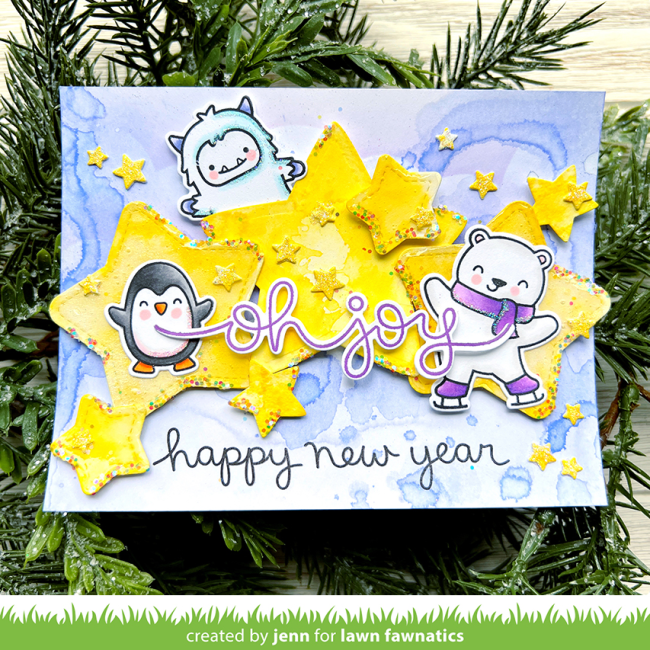
Jenn finishes out this festive collection with her joyful design! She combined critters from Beary Happy Holidays, Yeti or Not and Penguin Party to send happy wishes! She paired a greeting from Winter Big Scripty Words and Winter Scripty Sentiments! All of those awesome stars in the background are found in Outside In Stitched Stars and Puffy Star Stackables along with Hearts and Stars Skinny Tag!
I hope you have been inspired by these amazing projects! We will share more Design Team inspiration for you over the next 2 weeks and we’ll announce our Featured Fawnatics and random winner for Challenge 114 – Card Sketch tomorrow! Now it’s time for you to get creative!