Lawn Fawnatics Challenge 64 – Cards for Guys!

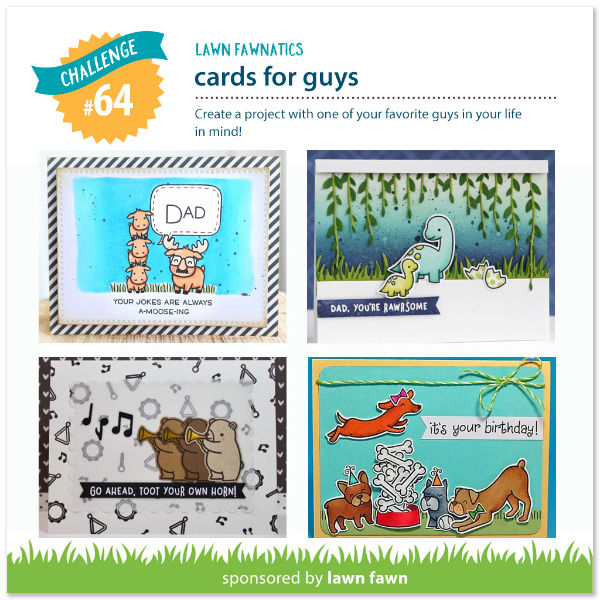
We all know that making cards for guys presents a few creative challenges. So let’s embrace that challenge and use our cardmaking skills to make cards to put a smile on a guy’s face, no matter the age!

We would love for you to share your creativity by linking up your crafty projects at the end of this post! Your project should feature Lawn Fawn stamps, dies and papers. This challenge will run for 2 weeks and be open until Sunday, November 17th at 11:59PM ET.

For each challenge, we will randomly select an entry to receive a $25.00 gift certificate to the Lawn Fawn shop! We will also be highlighting a few of your fabulous projects at the close of each challenge! By linking your projects to our challenges you will give permission for us to post your work to this blog and our social media sites. Check out the How to Play page for a few guidelines to play along. We want this to be FUN so we’ll keep the rules to just a few!

Now let’s see how our amazing Design Team made their Cards for Guys!

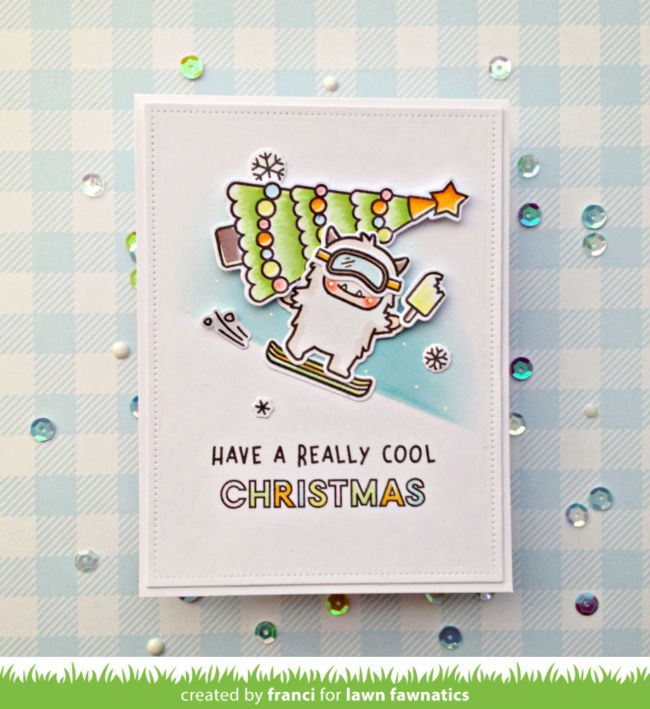
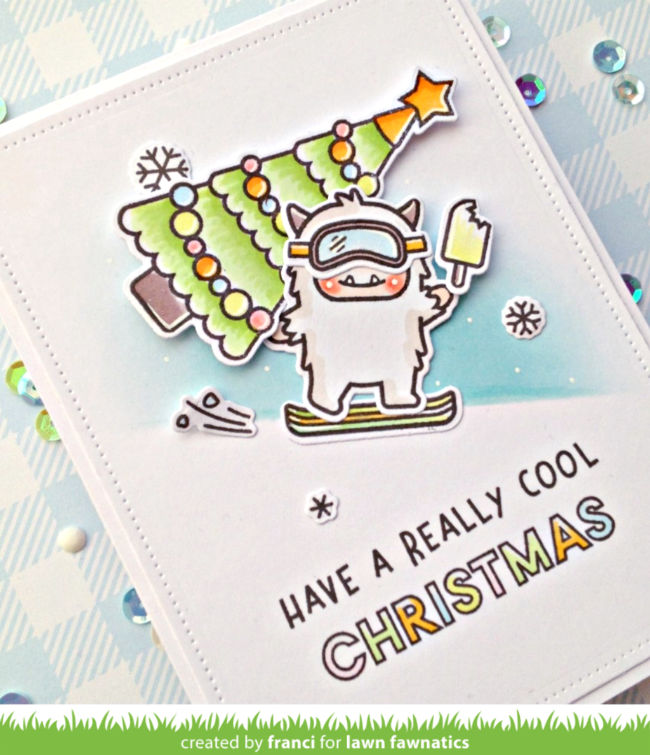
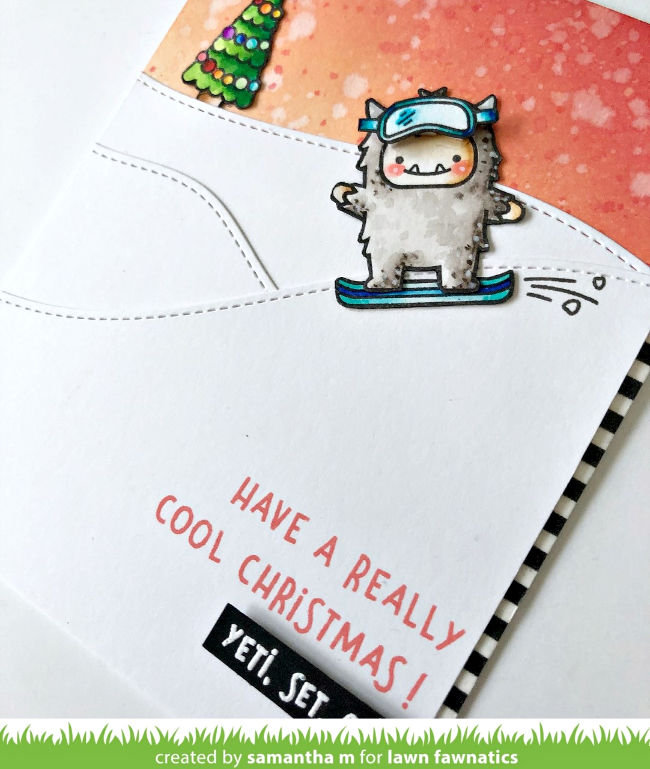
Franci combined the large tree from Christmas Dreams with the snowboarding and popsicle snacking Yeti or Not cutie on her clean and simple design! She added a colorful Offset Sayings: Christmas greeting!

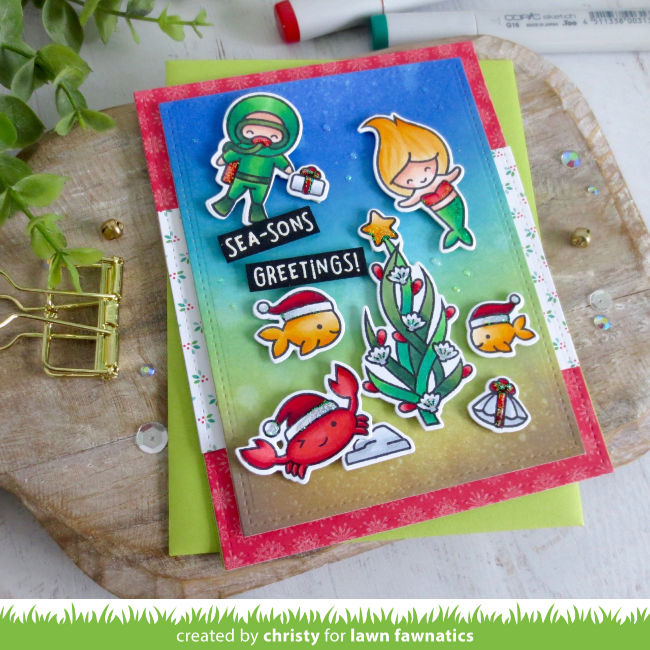
Christy created an amazing underwater Christmas card for her scuba-diving enthusiast brother! She used Christmas Fishes, You Are Sublime and Mermaid for You!

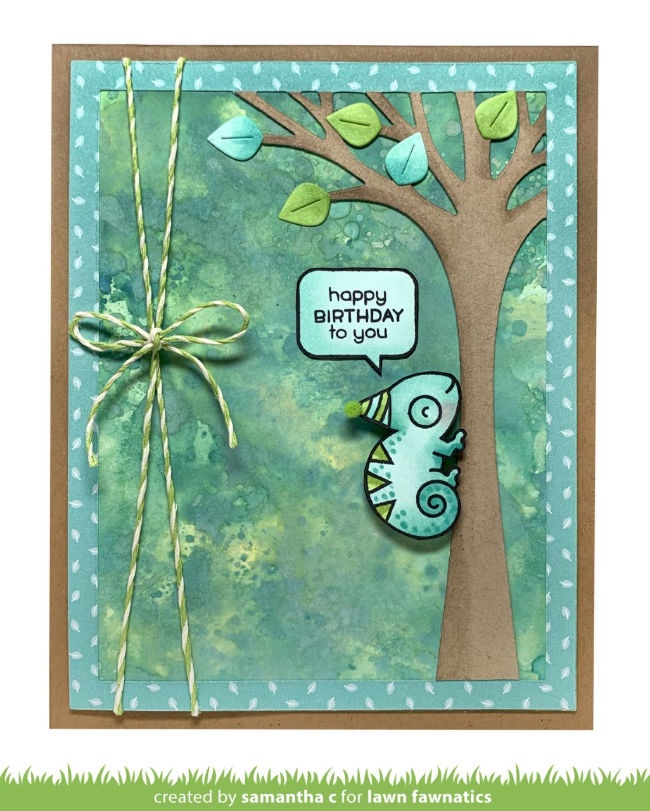
Samantha‘s birthday card features some cool guy-friendly colors to create the inky background for the One in a Chameleon critter! She turned the Leafy Tree Backdrop (die cut from the back side of the Fall Fling 6×6 paper) around to use it on the right side of her card, then she die cut it again from kraft cardstock to layer over the top! She included a Tiny Tag Sayings: Birthday sentiment in a Say What? Pets speech bubble.

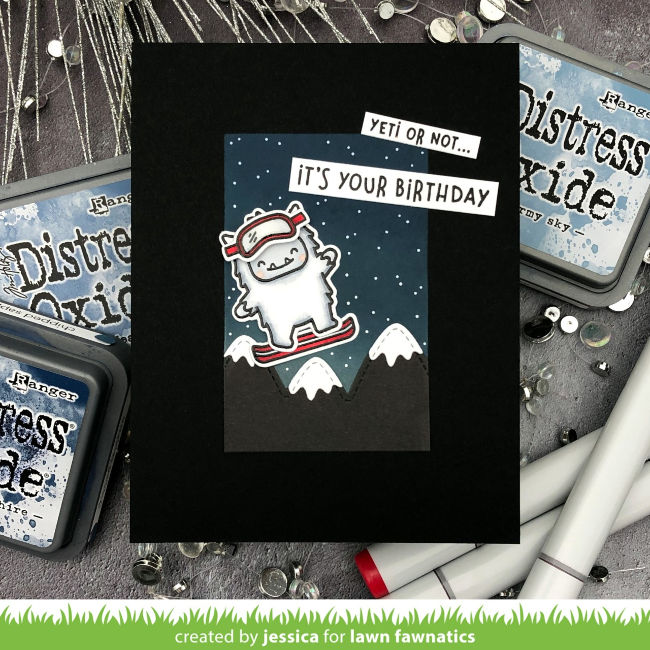
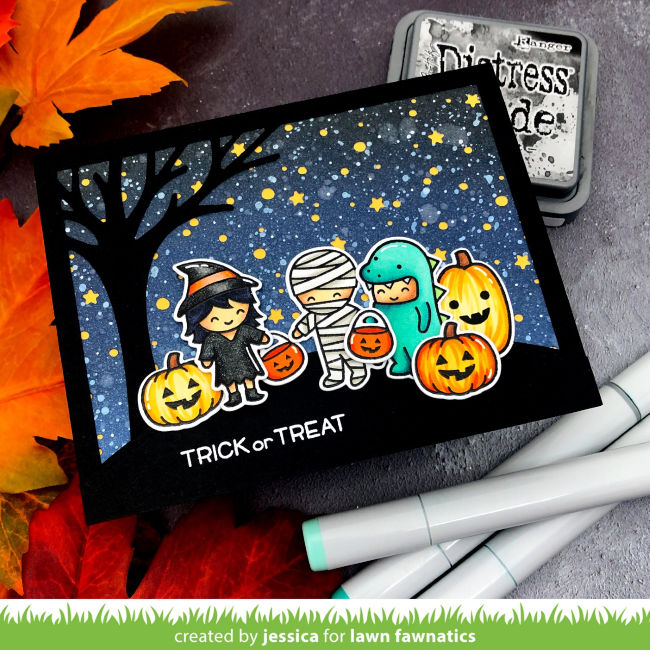
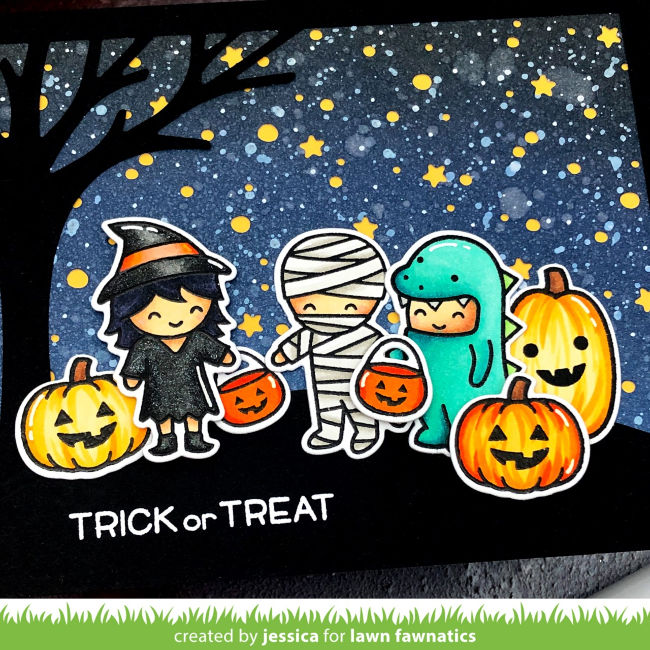
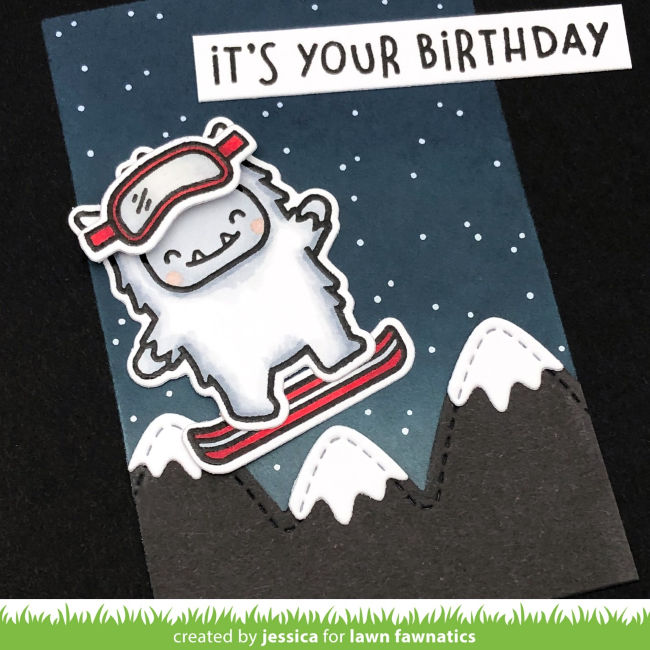
Jessica‘s Yeti or Not birthday card is fun and cool and perfect for the guys in your life! She created the awesome mini scene with Stitched Mountain Borders!

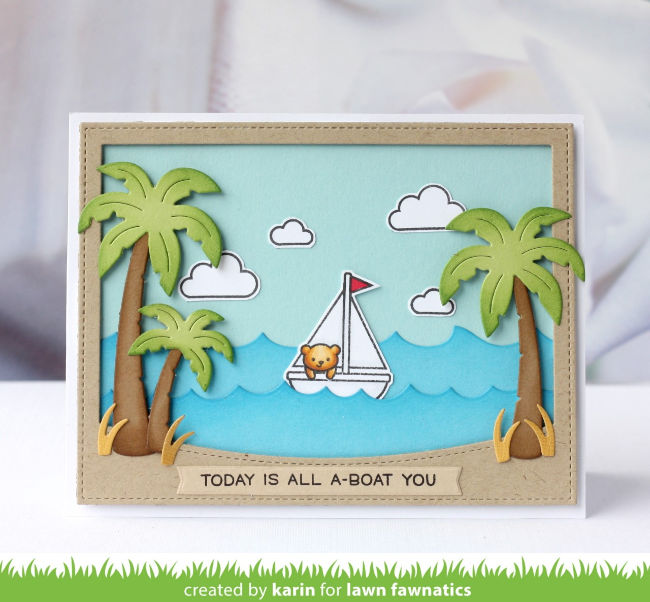
If you are in the Southern Hemisphere, Karin‘s card is timely inspiration for you! She used images from Smooth Sailing and created a great ocean scene with Tropical Backdrop!

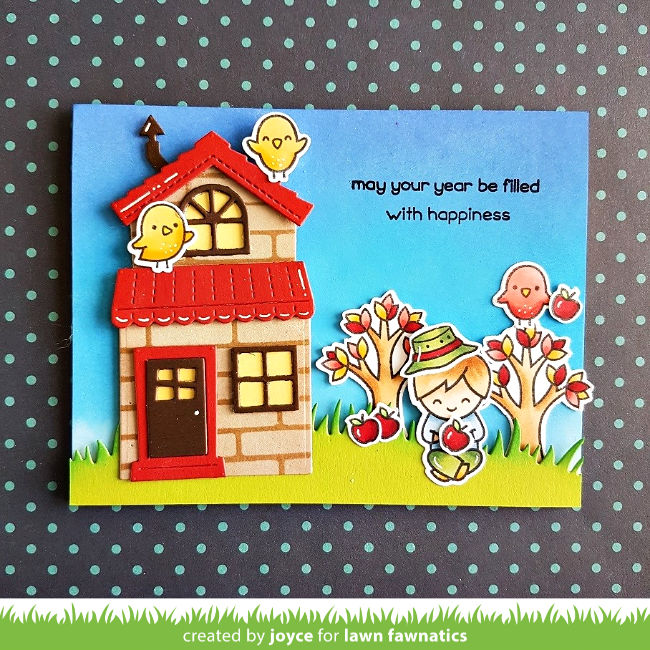
This charming birthday card by Joyce will make anyone’s day! She added a hat from Dad+Me to the character from Screen Time and made a Fall scene using the trees and apples from Tree Before ‘n Afters! The Build-A-House has a fun brick pattern and some friendly birds from Open Me!

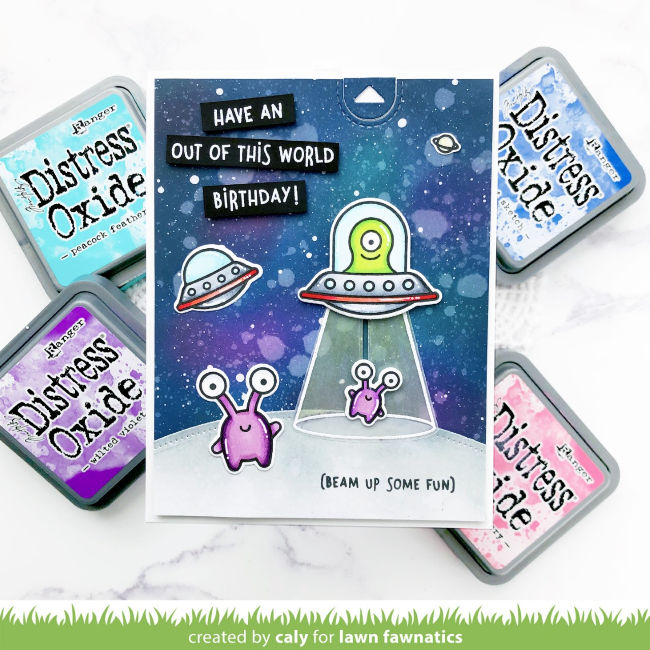
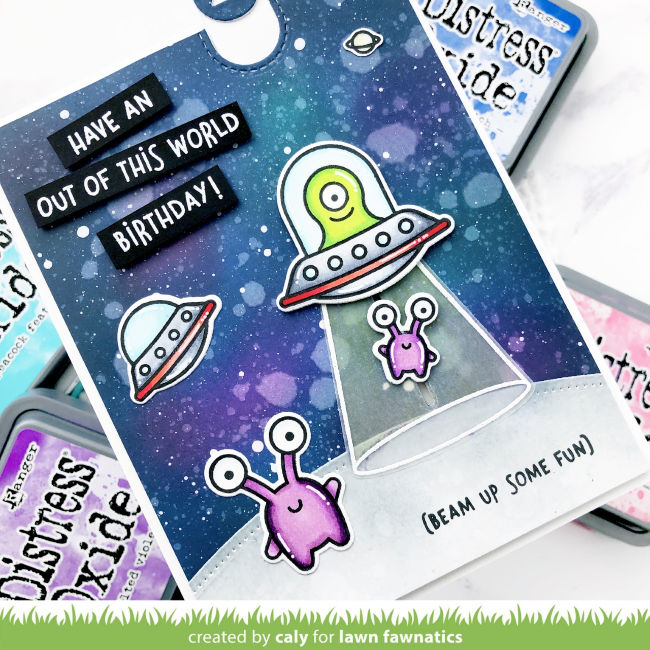
Caly‘s Beam Me Up birthday card has a fun interactive element courtesy of the Let’ Toast Pull Tab Add-On! She created an awesome inky backdrop for this outer space scene!

Clearly our Design Team thinks that snowboarding and yetis are perfect for Cards for Guys! Samantha M added her signature style with an ink blended and splattered background and the stripey accent of black and white! She resisted the pull to add sequins or glitter to keep this fun design guy-friendly!

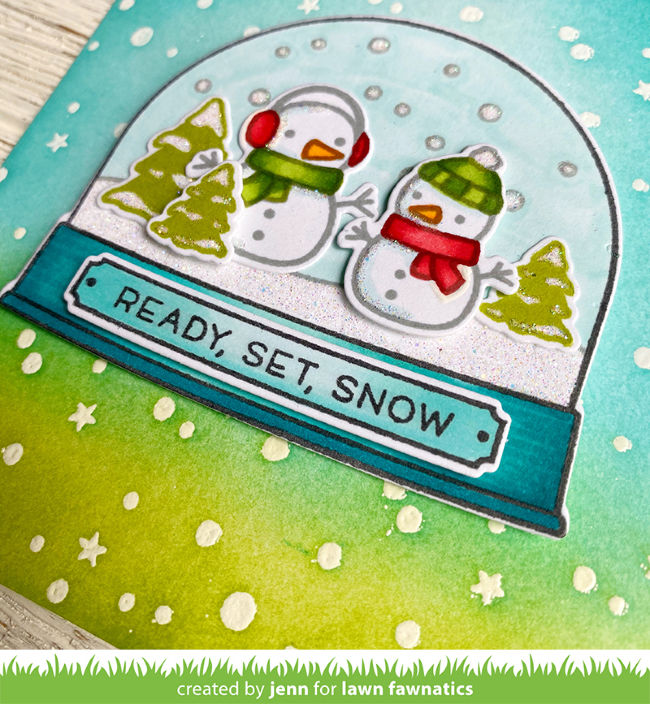
Jenn‘s Ready Set Snow snow globe design has just enough sparkle to suggest snow but she kept this card clean, simple and colorful! She used a mix of Lawn Fawn ink in Merman, Cilantro and Minty Fresh to create the background. Her snowmen are stamped with River Rock ink for a toned down look!

We will share Design Team inspiration for you over the next 2 weeks and we’ll announce our Featured Fawnatics and random winner for Challenge 63 tomorrow!

You are invited to the Inlinkz link party!

Click here to enter

Jessica’s Costume Party Card!

Good morning! Jess here with a card for our current Inspiration Board challenge! I decided to use the colors as my inspiration with a little nod to the witch’s hat and the pumpkin! 😉

To start I stamped the cute kids and pumpkins from Costume Party and an extra big pumpkin from Pick of the Patch with Versafine and heat-embossed them with clear embossing powder before coloring them with Copic markers. I used the colors of the challenge photo as the colors of my costumes. When I was done coloring I die-cut everything with the coordinating dies. I also applied my glitter pen liberally to the witch’s costume!

Next, I blended Faded Jeans, Chipped Sapphire, and Black Soot Distress Oxide ink onto a panel of Strathmore Bristol cardstock. I splattered it with water and Liquid Stardust and let it dry. I also added splatters of white acrylic paint. Once it was totally dry, I die-cut it with the Snowy Backdrop die and adhered it to Sunflower cardstock to create a starry night sky instead of a snowy sky! Then I added the Leafy Tree Backdrop: Landscape cut from black licorice cardstock on top.

I stamped a sentiment from Costume Party onto Black Licorice cardstock and then die-cut it with the Simple Stitched Hillside dies. I adhered that over my background and then added my kids and their pumpkins! To finish the card I added accents with a white gel pen!

And that’s it! You have one more weekend to get crafty and I can’t wait to see what you’ll create! Thanks so much for stopping by and have a fantastic weekend!

Jess

Our Halloween Inspiration Board challenge will close this Sunday, October 20th at 11:59PM ET. We hope you will join us!

Supplies:

We hope you have a fun and crafty weekend! Thanks for stopping by!

Jessica’s Great Pumpkin Card!

Good morning! Jess here with a card for our current Awesome Autumn challenge! Autumn is my favorite time of year and it’s just not the season without my annual viewing of It’s The Great Pumpkin, Charlie Brown so I used that as inspiration for my card today!

To start I blended Blueprint Sketch, Chipped Sapphire, and Black Soot distress oxide ink onto a panel of white cardstock to create a night sky. Then I die-cut the Stitched Hillside Backdrop: Landscape from Black Licorice Cardstock and layered it over the blended background. I die-cut a large circle from the Circle Stackables and blended a little Scattered Straw and Mustard Seed distress oxide ink to create a glowing moon. Next I die-cut the Bayou Backdrop twice and the leaves from Leafy Tree Backdrop: Portrait from Noble Fir cardstock and blended a little Black Soot distress oxide ink onto some of the greenery. I set those aside to dry while I worked on the rest of the card.

Next I stamped my Pick of the Patch pumpkins three times with Versafine and heat-embossed them with clear embossing powder. I colored them with Copic markers, die-cut them with the coordinating dies, and then went over the edges of the die-cut images with a black Copic marker so they would blend better with the background. I also stamped my sentiment with Milo’s ABCs onto white cardstock, trimmed it down to create a sign and added a little Copic shading.

Then I tucked my moon behind the Stitched Hillside, and added my pumpkins and “vines.” I added a few accents with a white gel pen and stars in the sky with a white paint pen. I tucked in my sign and then finished the card with a few blasts of silver glitter dust for even more sparkle!!

And that’s it! You have two more weeks to get crafty and I can’t wait to see your Awesome Autumn creations! Thanks so much for stopping by and have a fantastic weekend!

Supplies: