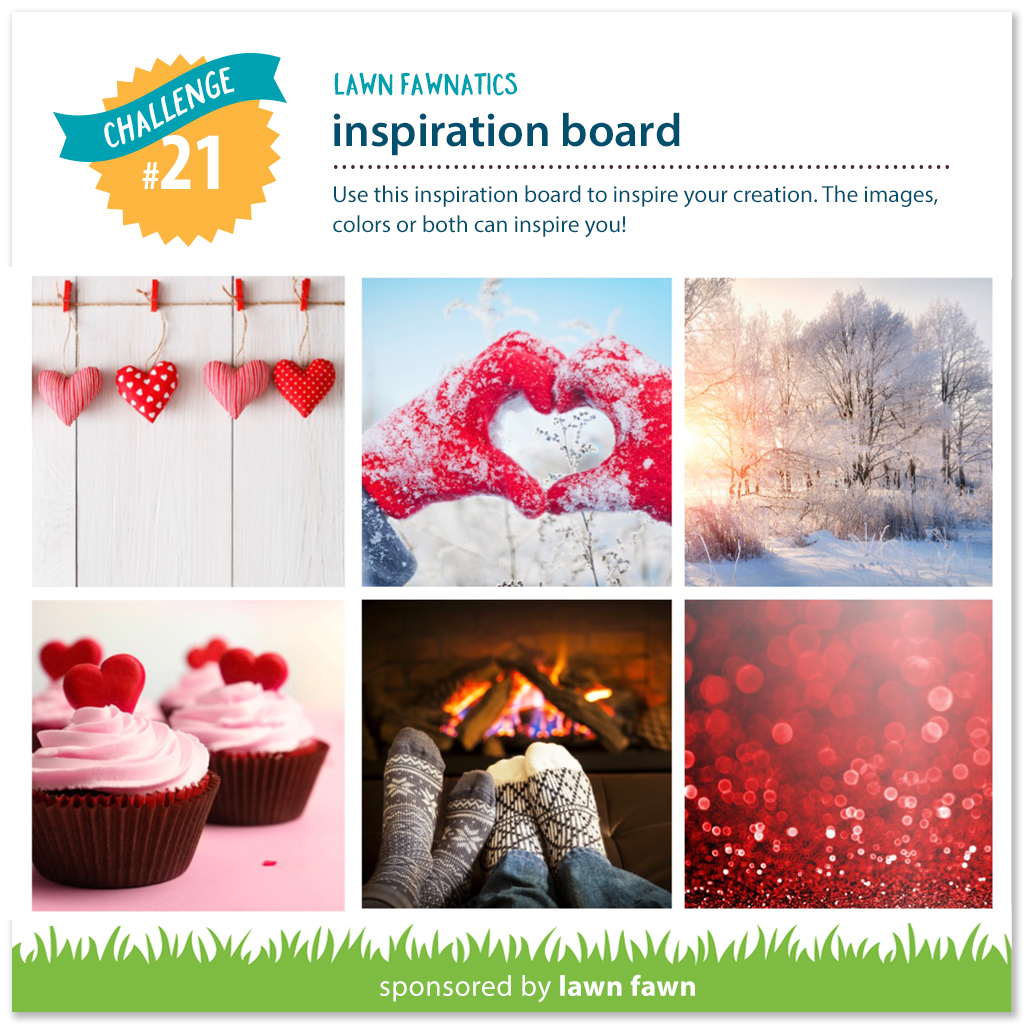
Welcome to Challenge 21! This time we have an Inspiration Board with beautiful images to inspire your creativity! This will be a 3 week challenge open until Sunday, February 4 at 11:59PM ET. Have fun with this challenge, we can’t wait to see how you will use this inspiration!
 For each challenge, we will randomly select a winner to receive a $25.00 gift certificate to the Lawn Fawn shop! We will also be highlighting a few of your fabulous projects at the close of each challenge! By linking your projects to our challenges you will give permission for us to post your work to this blog and our social media sites. Check out the How to Play page for a few guidelines to play along. We want this to be FUN so we will keep the rules few!
Let’s check out how our Design Team used the Inspiration Board!
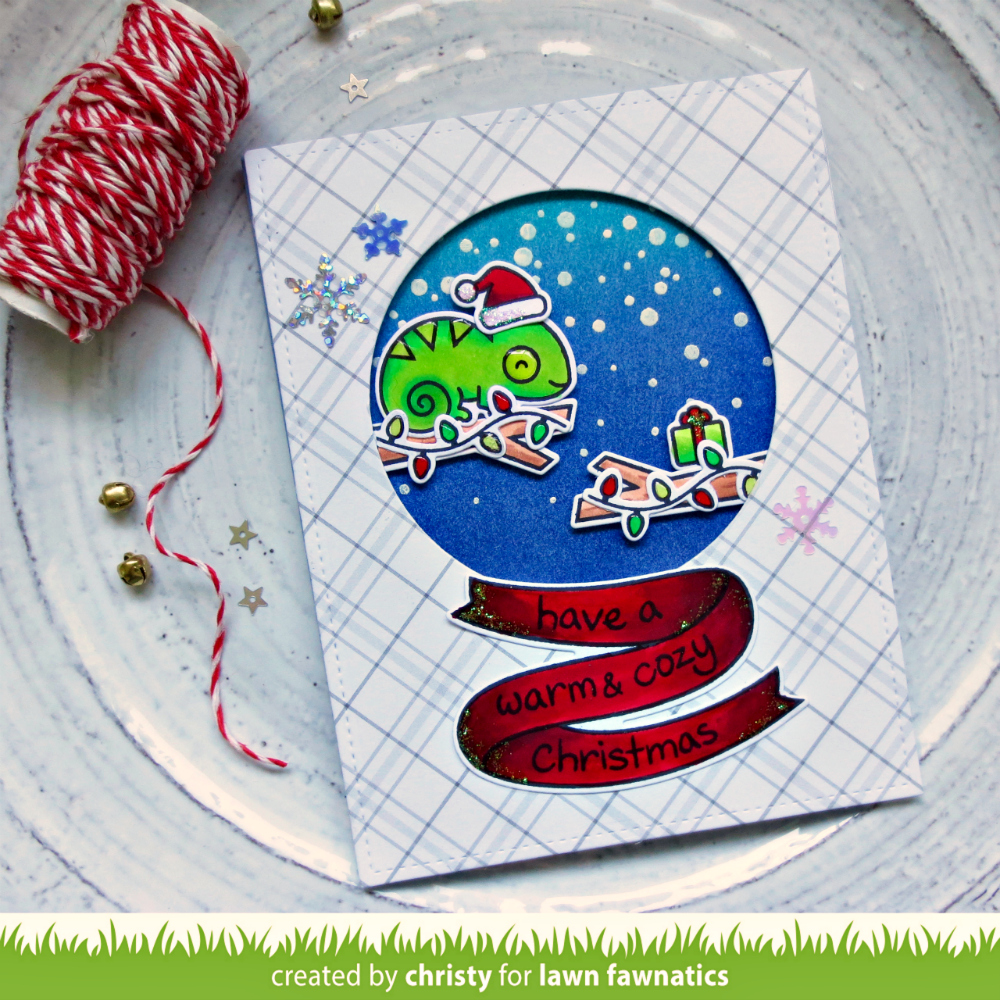
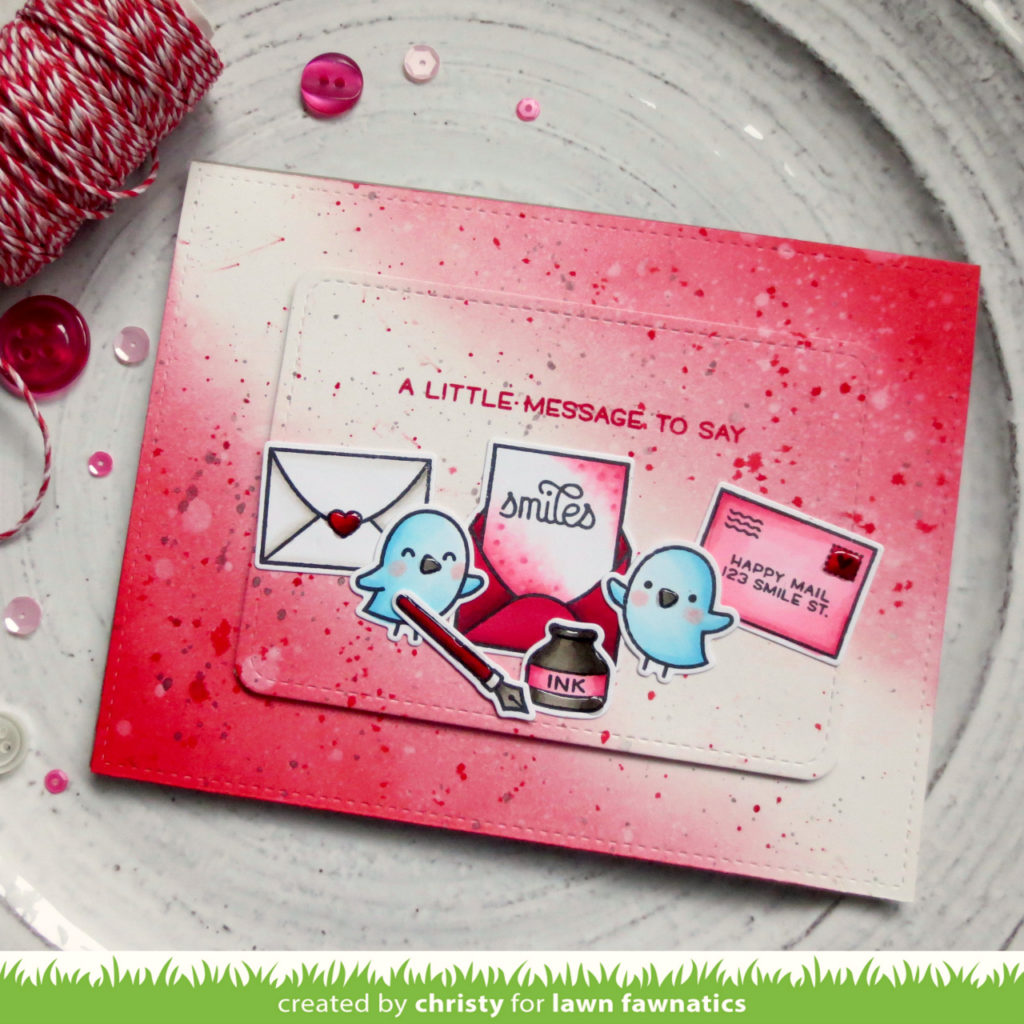 Love Letters and a beautiful red background with pops of blue highlight Christy‘s sweet card!
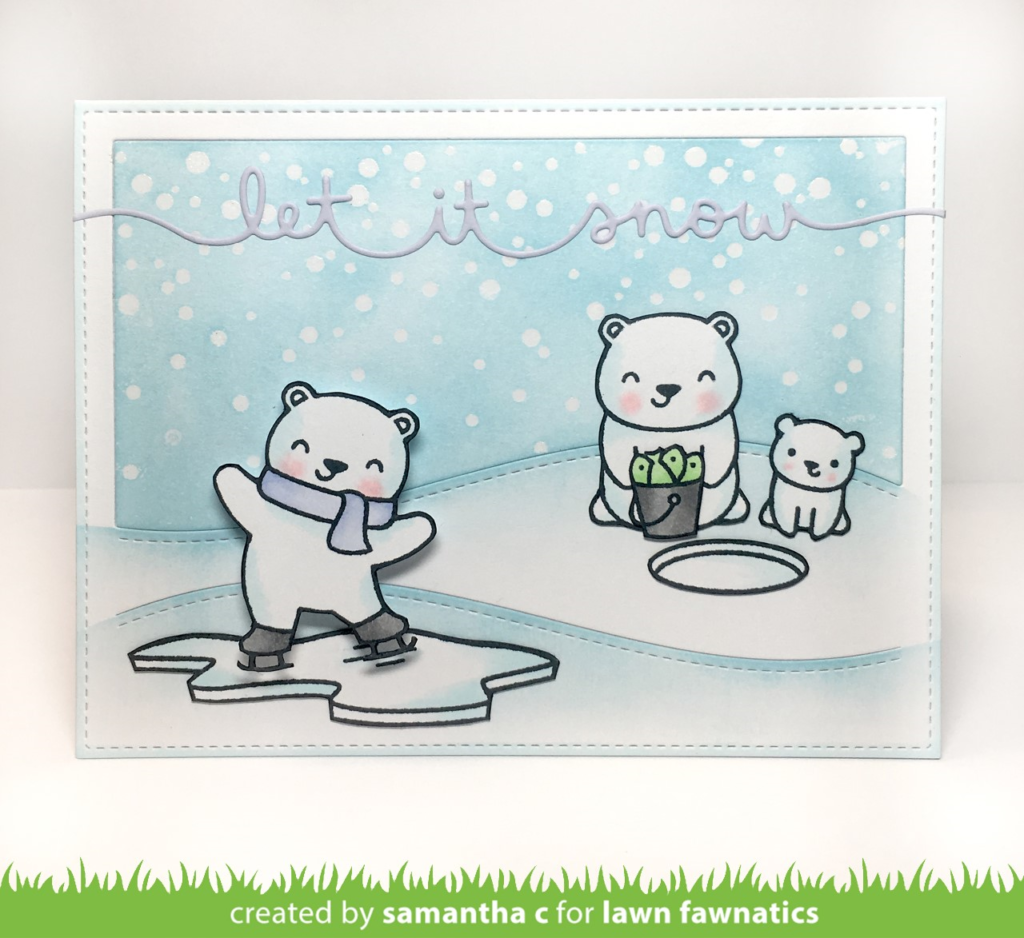
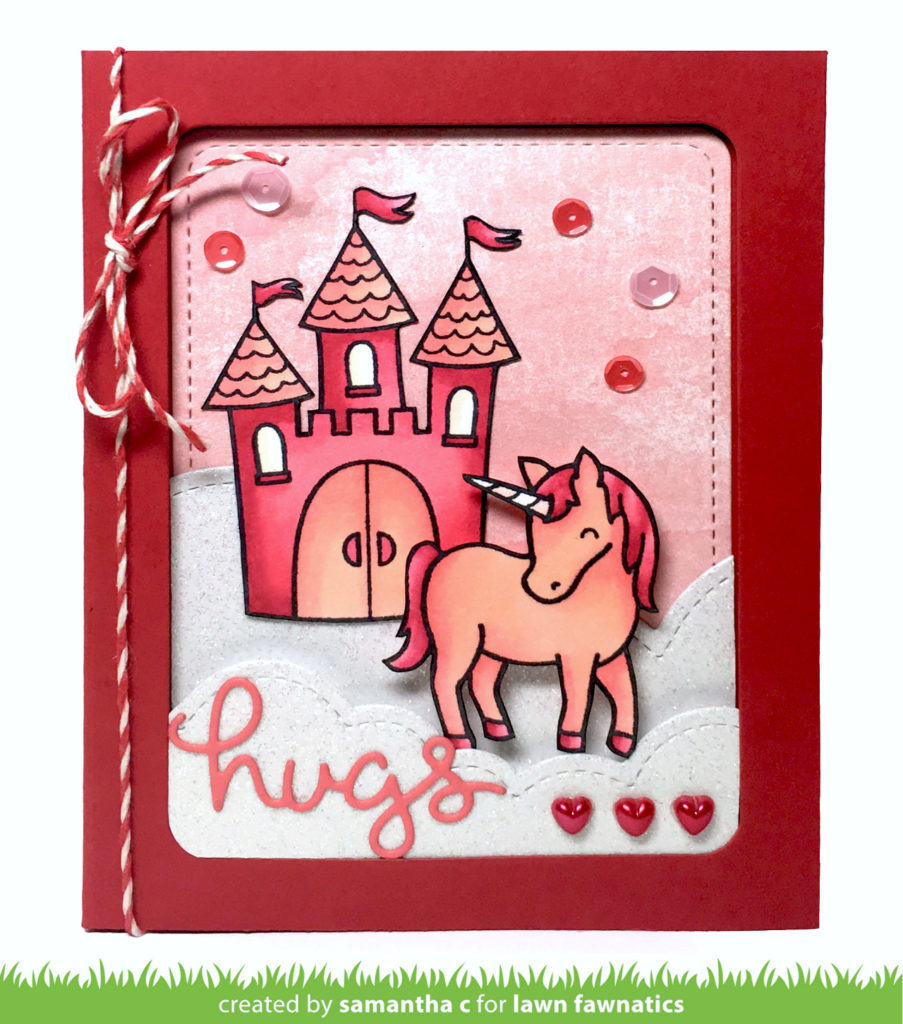 Samantha C. created a magical scene with Critters Ever After and Puffy Cloud Borders! The die cut hugs is from the Stitched Gift Card Pocket set.
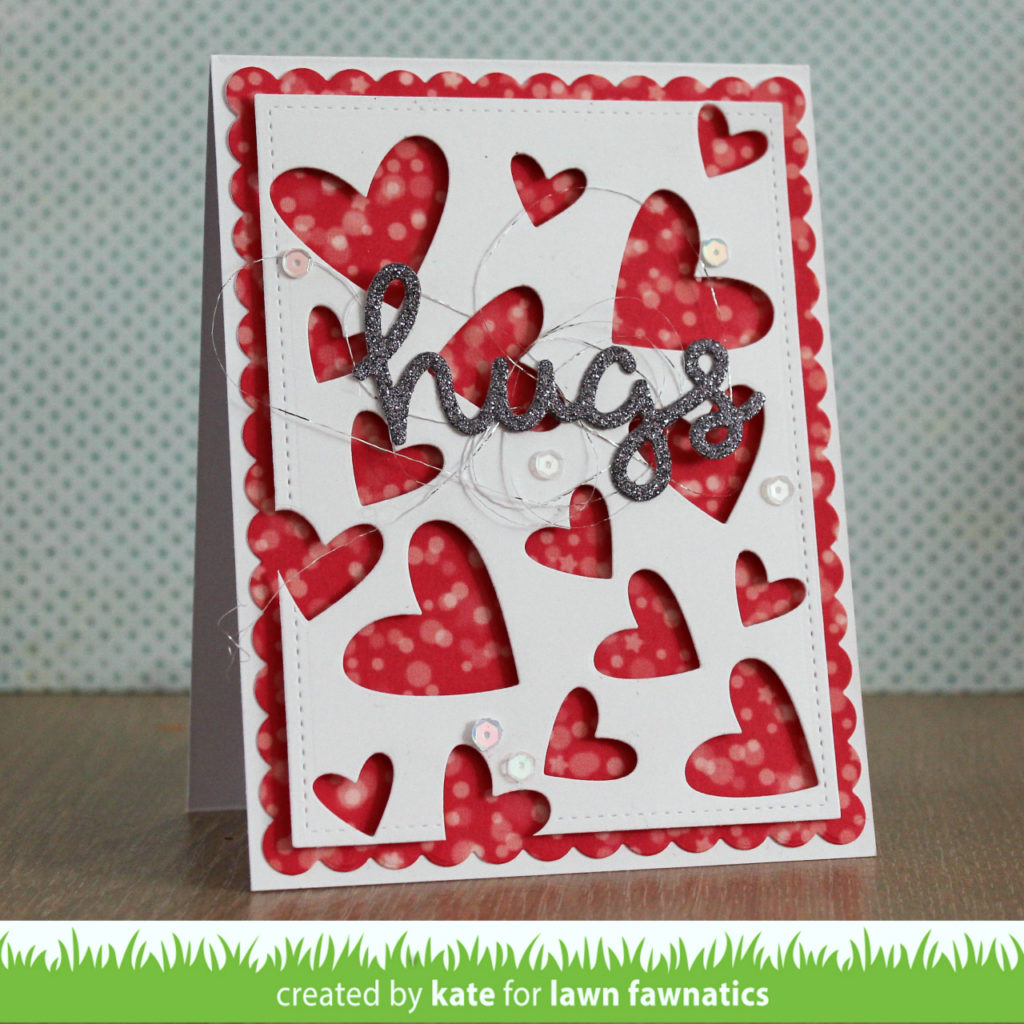 Kate‘s fabulous and trendy Valentine design features Hearts and Scripty Hugs Lawn Cuts dies!
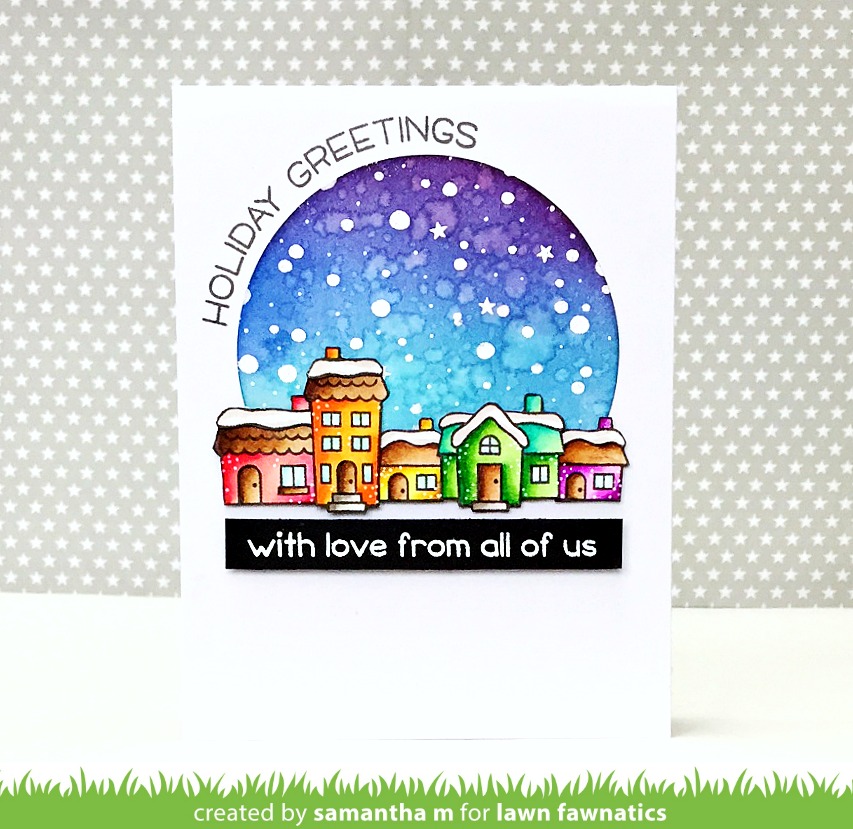
 Samantha M designed an adorable card with the cute narwhal from Critters in the Arctic combined with a witty Valentine greeting!
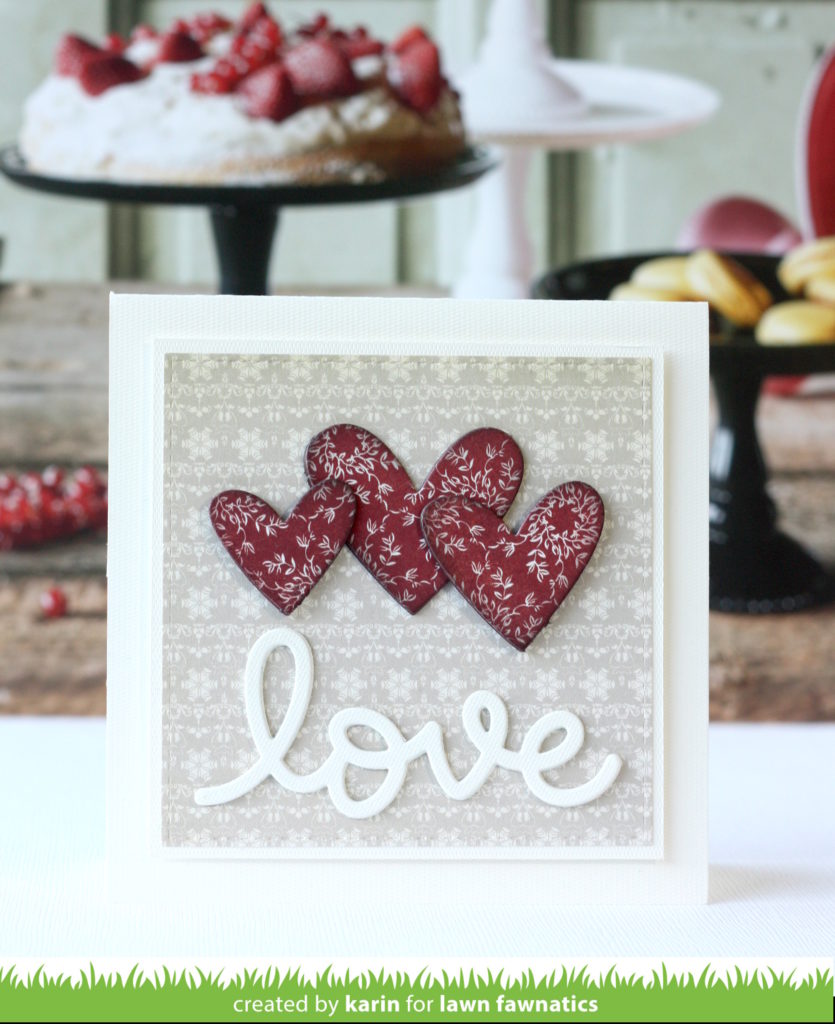 Karin‘s gorgeous card is a clean and simple no-stamp design using Hearts dies and Scripty Love!
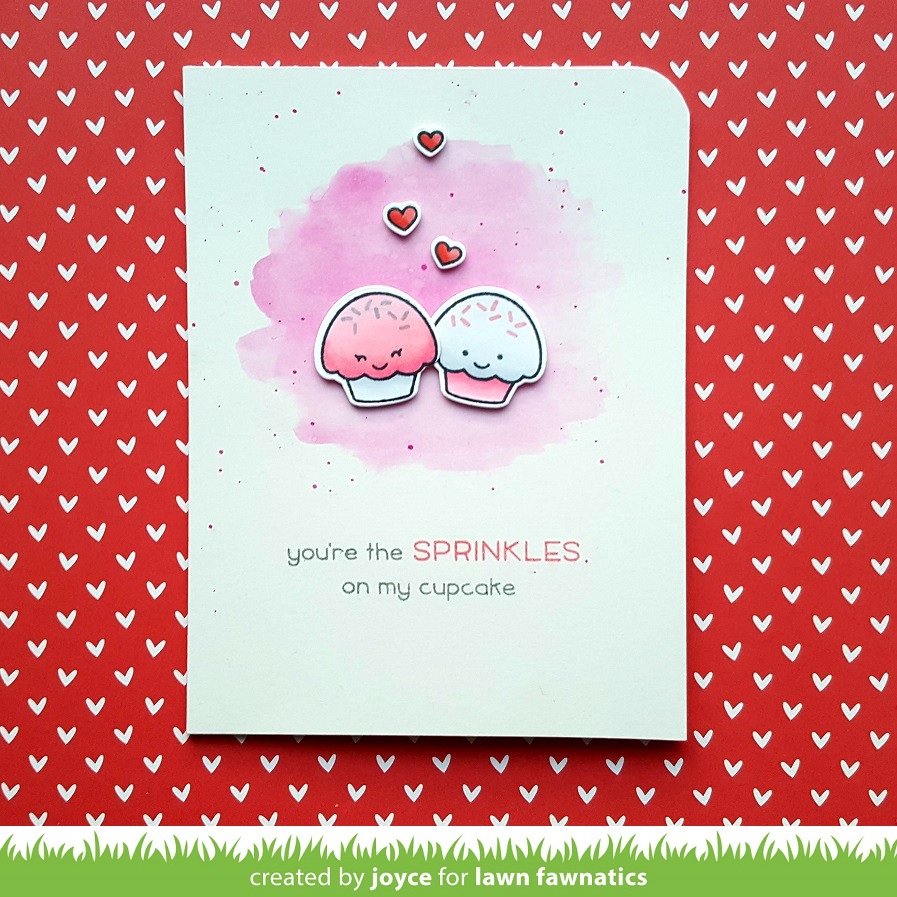 Joyce was inspired by the cupcake image in the Inspiration Board to make an adorable Sweet Friends design!
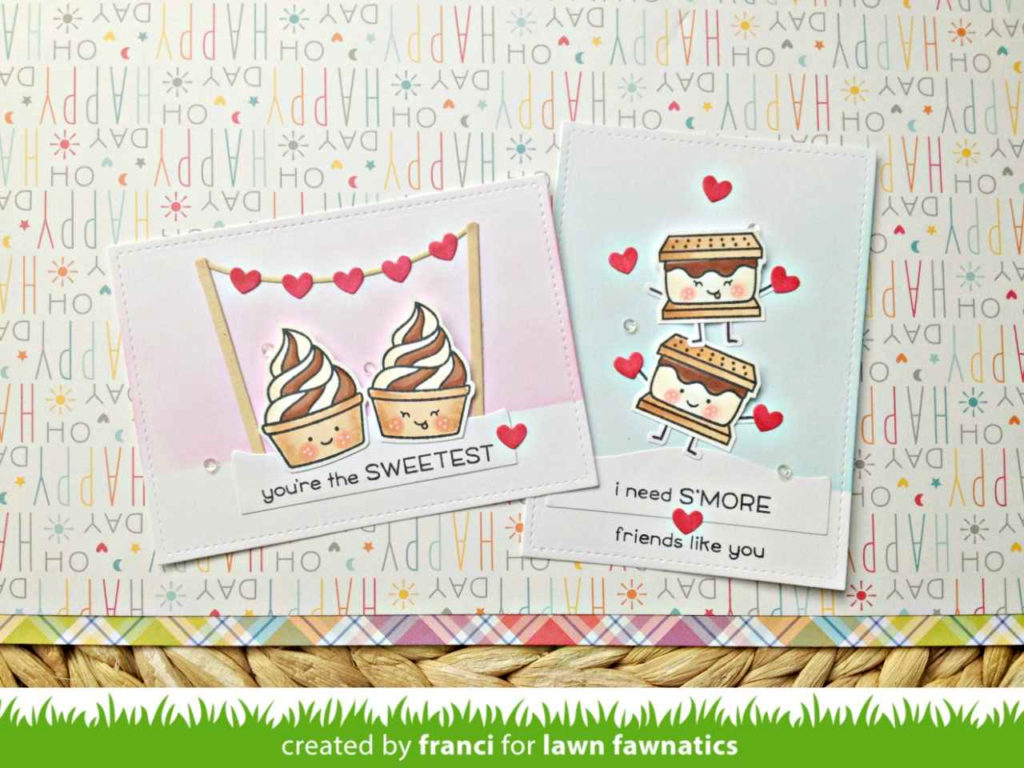 Franci was also inspired to create two whimsically cute cards with Sweet Friends!
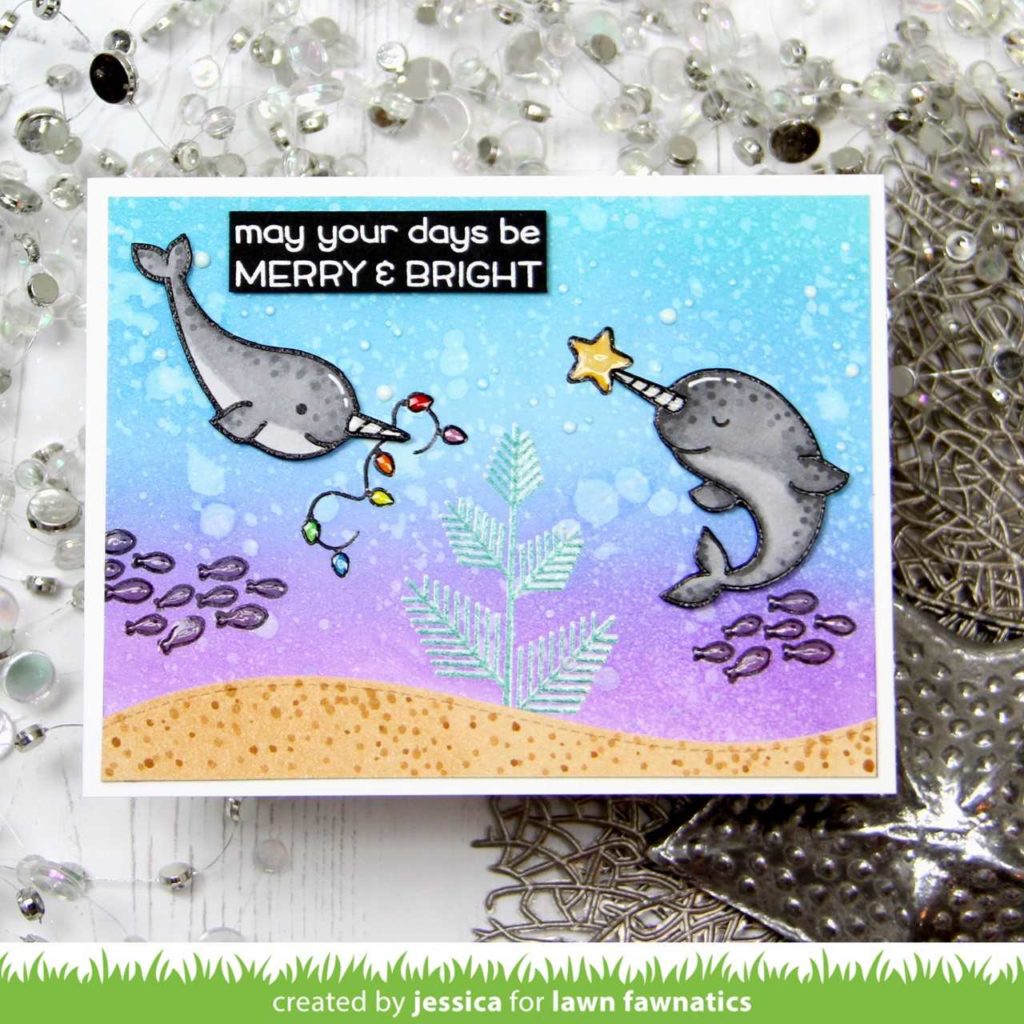
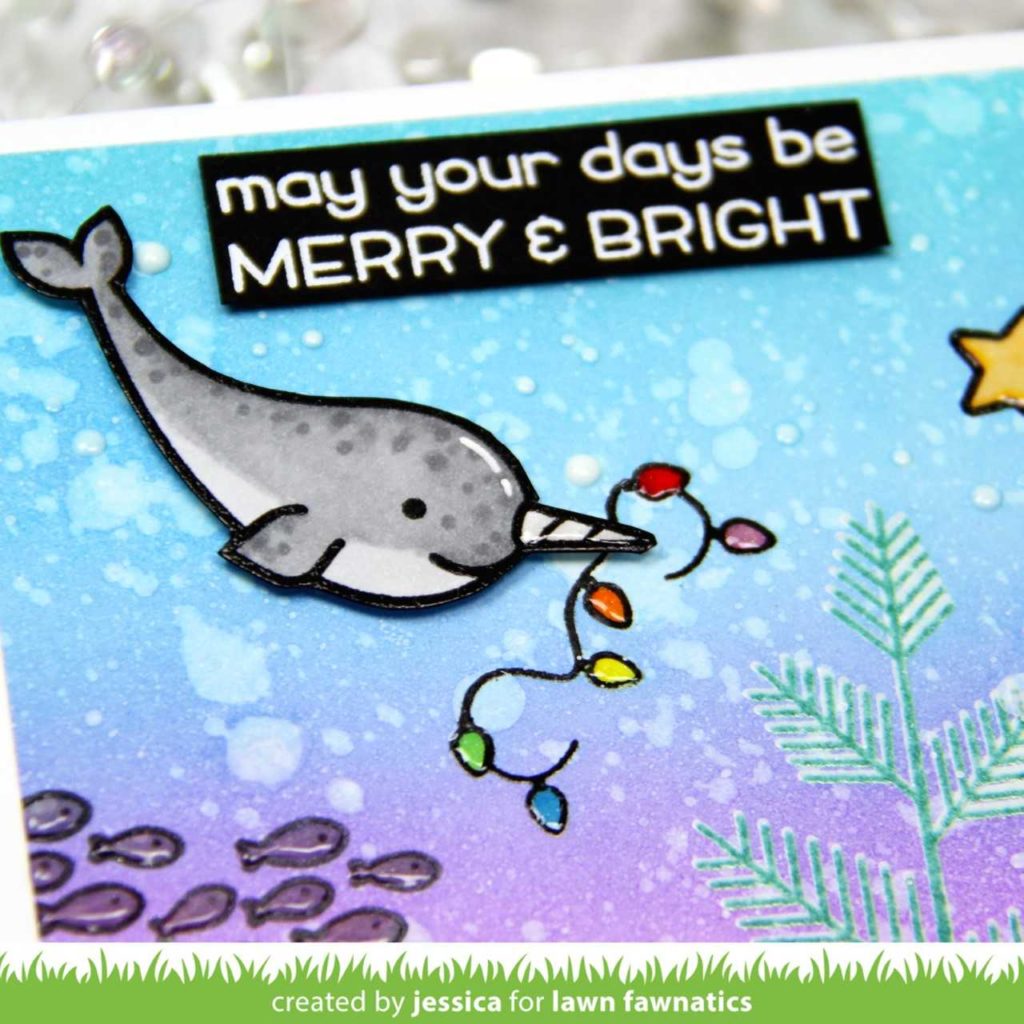
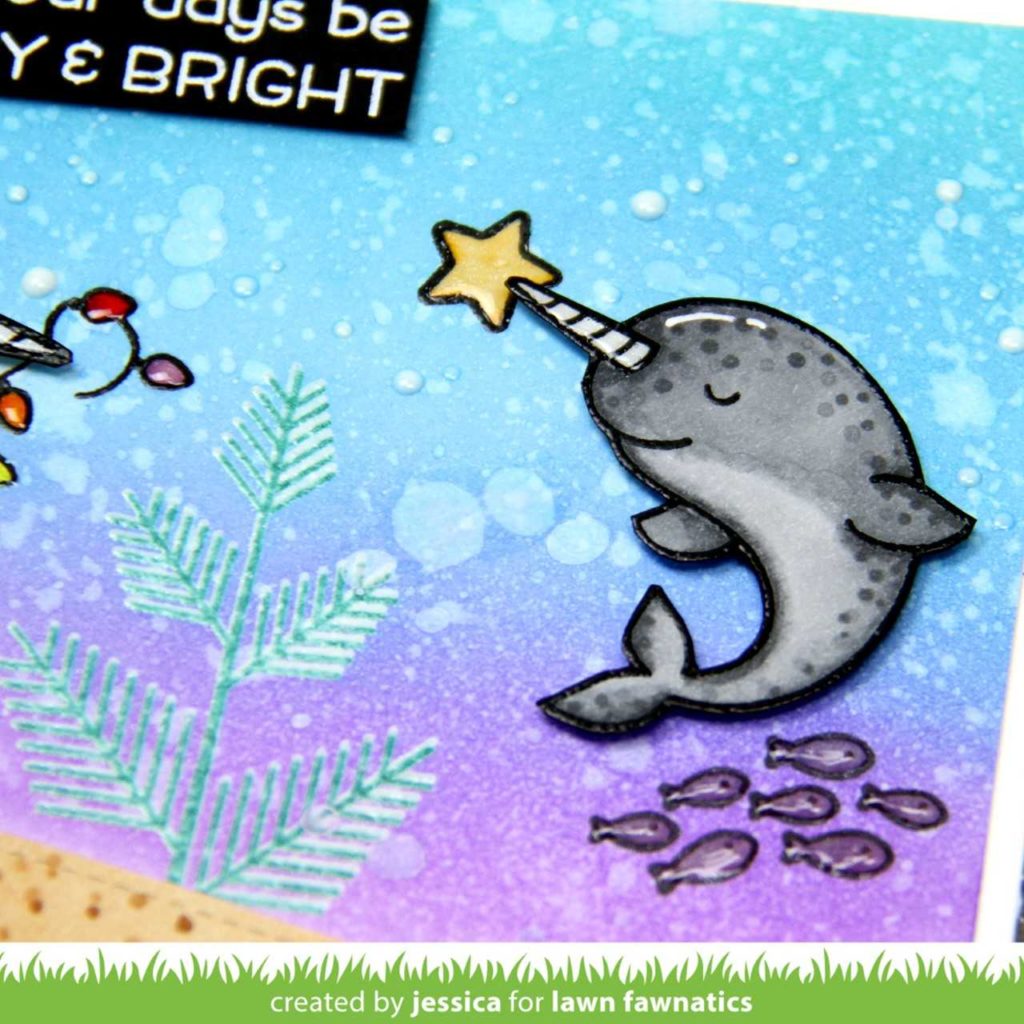
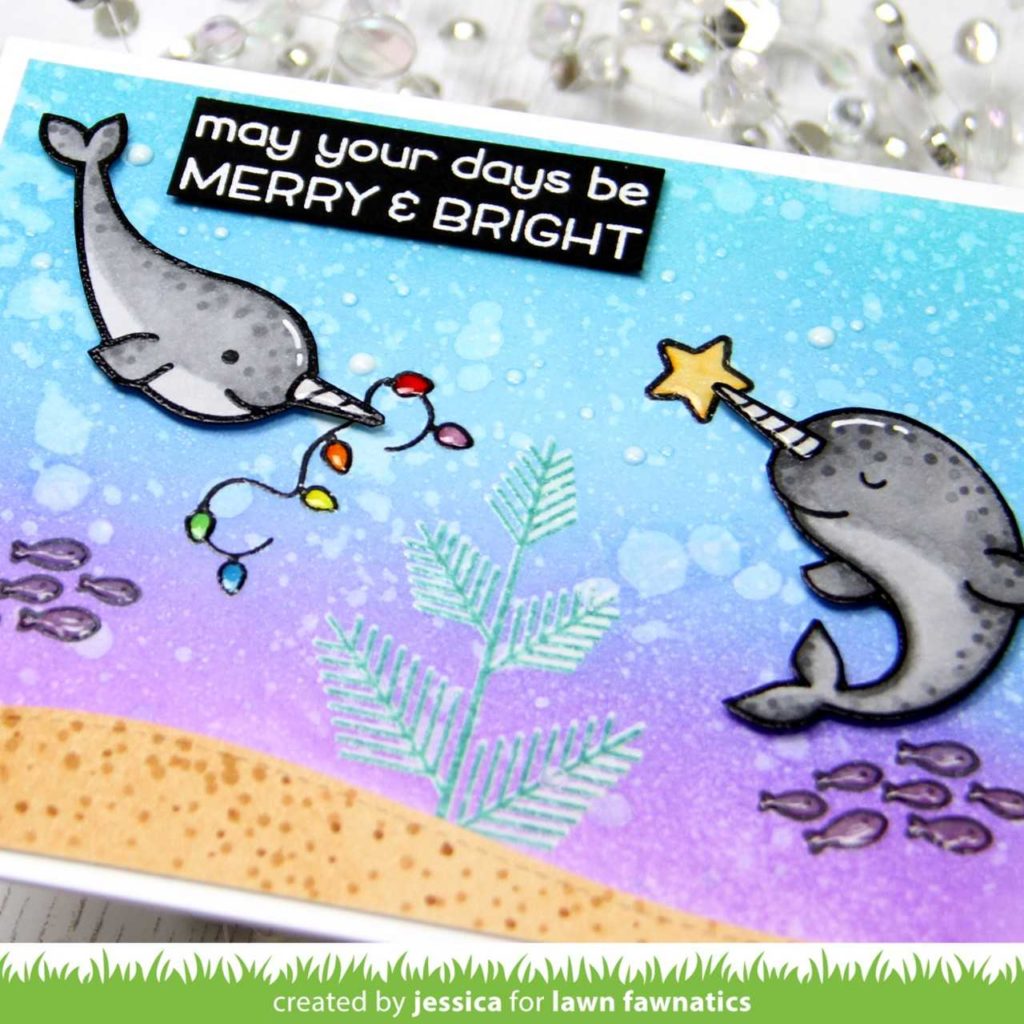
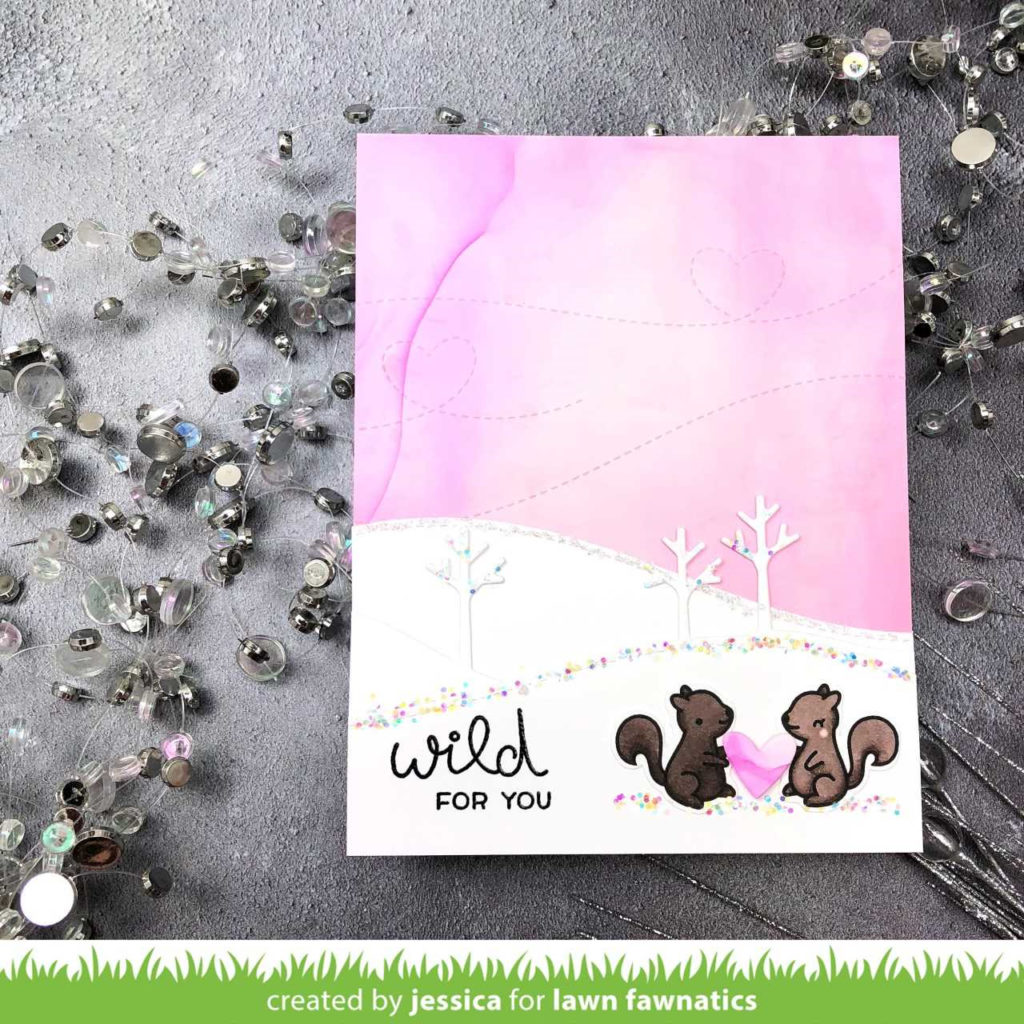 Jessica‘s beautiful winter scene pairs Cheery Christmas with a greeting from Wild for You! Lawn Fawn Chunky Glitter adds some snowy sparkle!
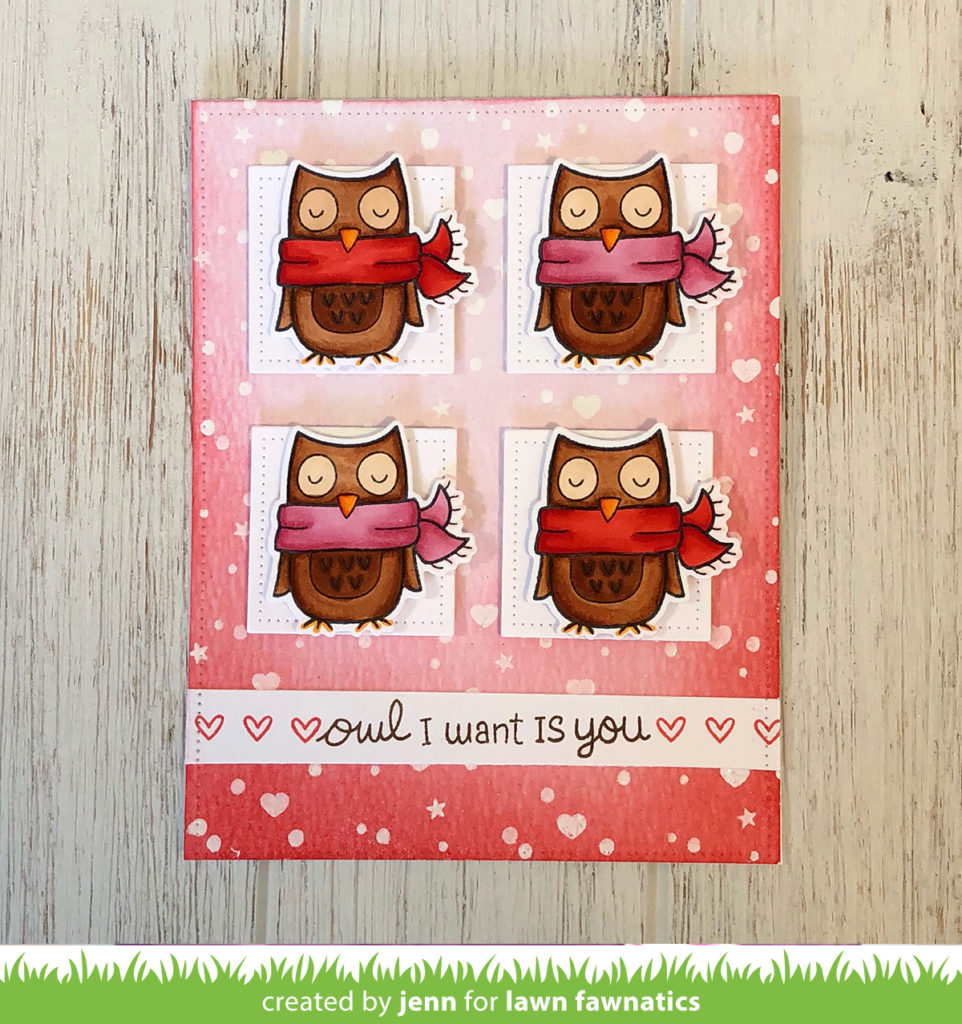 Jenn was inspired by the bokeh photo to create a beautiful backdrop for the cute Winter Owl grid!
We will have Design Team inspiration for you over the next 3 weeks and be sure to come back for our Featured Fawnatics and Random Winner from Challenge 20 tomorrow!