
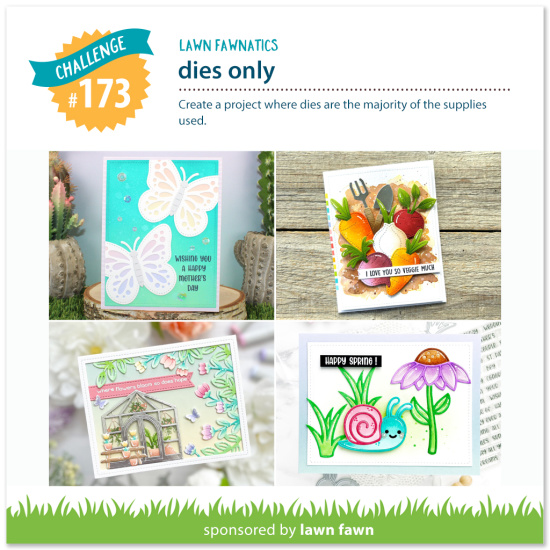
You are invited to share your creativity by linking up your crafty projects at the end of this post! Your project should feature Lawn Fawn stamps, dies, stencils and papers. This challenge will run for 2 weeks and be open until Sunday, June 2 at 11:59PM ET.
For each challenge, we will randomly select an entry to receive a $50.00 gift certificate to the Lawn Fawn shop! Everyone who enters a challenge has a chance to be the random drawing winner! Woohoo!
We will also be highlighting a few of your fabulous projects at the close of each challenge! By linking your projects to our challenges, you will give permission for us to post your work to this blog and our social media sites. Check out the How to Play page for a few guidelines to play along. We want this to be FUN, so we’ll keep the rules to just a few!
Hey Friends, it’s Christy here with another card for our Dies Only Challenge. On my previous card featuring the Cactus Hillside Border, I used the frame from the Honeycomb Backdrop. I removed it carefully from the die, leaving all the leftover little bits stuck in place. I wanted to find a way to use up those pieces, so I built today’s card idea around that.
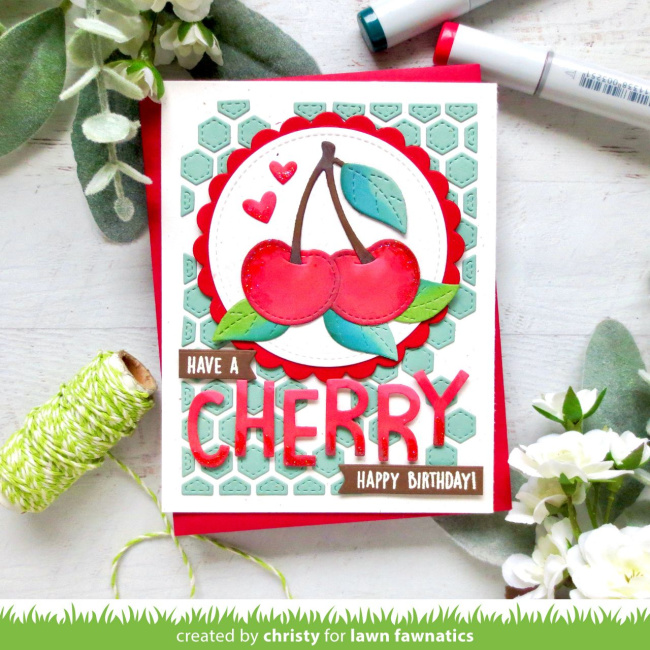
I started with the Cheery Cherries, and die cut the pieces I would need out of Lawn Fawn cardstock, then blended on Distress Oxide Inks to give them definition. For the cherries themselves, I used Guava Cardstock, then added Festive Berries, Candied Apple, and a tiny bit of Vintage Photo. Then I did a stem out of Chocolate Bar and blended on Vintage Photo, and two stems each out of Sage Leaf and Algae. I trimmed off only the leaves from these and blended on Evergreen Bough and Mowed Lawn.

Then I took some Speckled Eggshell cardstock and die cut it with the second largest Large Stitched Circle Stackable, and Barn Red cardstock cut with the second largest Scalloped Circle Stackable. I assembled the cherries, adding a green leaf over the brown one, then adhered them to the focal panel with the extra leaves underneath.

I created an A2 standard size card base from more Speckled Eggshell and added little dabs of glue to the back of the leftover Honeycomb Backdrop pieces that I wanted to use, then lined up my card base over top, flipped it over, and used a craft pick to release the pieces from the die. Then I popped the focal panel toward the top with foam tape.
For part of the sentiment, I white heat embossed it onto Chocolate Bar Cardstock and trimmed it down with an Everyday Sentiment Banner into two strips. The rest I die cut from more Guava Cardstock using Finley’s ABCs and added the same ink blending as I used on the cherries. I popped all of this up with foam tape as well.
To complete the card, I added two hearts from the Heart Garden Border cut from Guava Cardstock and blended with a touch of Festive Berries. Then finished with a bit of Stardust Stickles. If you’d like to see how it all came together, you can check out the video tutorial on my YouTube channel, Christy Gets Crafty. I really hope you enjoy it!
I hope this has inspired you to play along with our Dies Only Challenge! We can’t wait to see what you create!
Thank you so much, Christy! I love this cheerful card!
Supplies:
Great card! Thanks for sharing this. Love the background.
Lori S in PA
Love how you used the leftover pieces from your previous card, so creative!
So cute! Love the colours you used! Amazing how you could lay the leftover pieces back so perfectly! I would have messed it up hahaha
This is simply gorgeous! I love the background, so creative and clever!
Oh wow I love this!