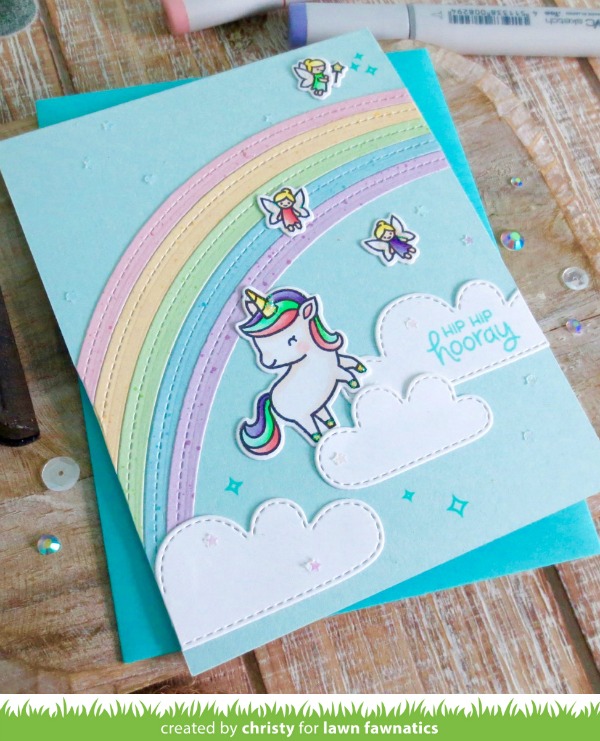
Hey friends, it’s Christy here with another fun take on our Sketch Challenge. I love using card sketches as inspiration, and the best part about them is that you can take them as literal or as loose as you like! They’re meant to be a jumping off point, but where you take it from there is up to you.
On my project from the original challenge post, my card layout was pretty spot on. This time, I decided to take a little more liberty with the sketch. I’ll walk you through my thought process, and hopefully you’ll be inspired to interpret future card sketches in new and fun ways!
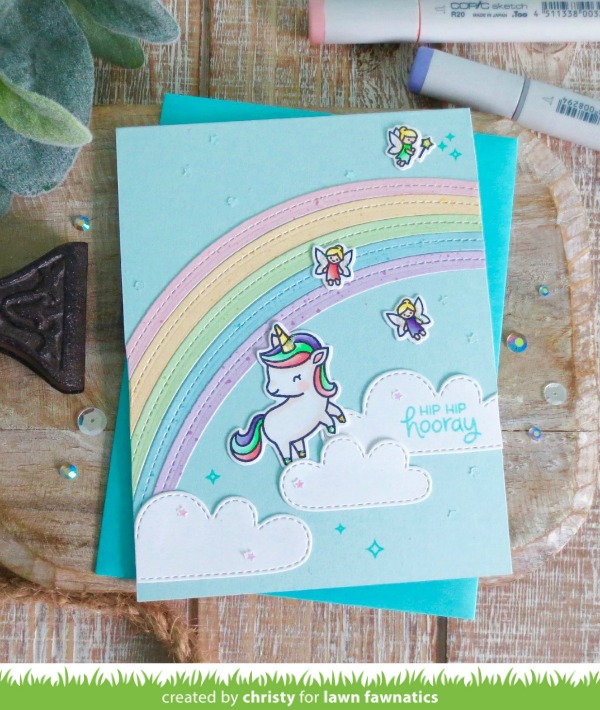
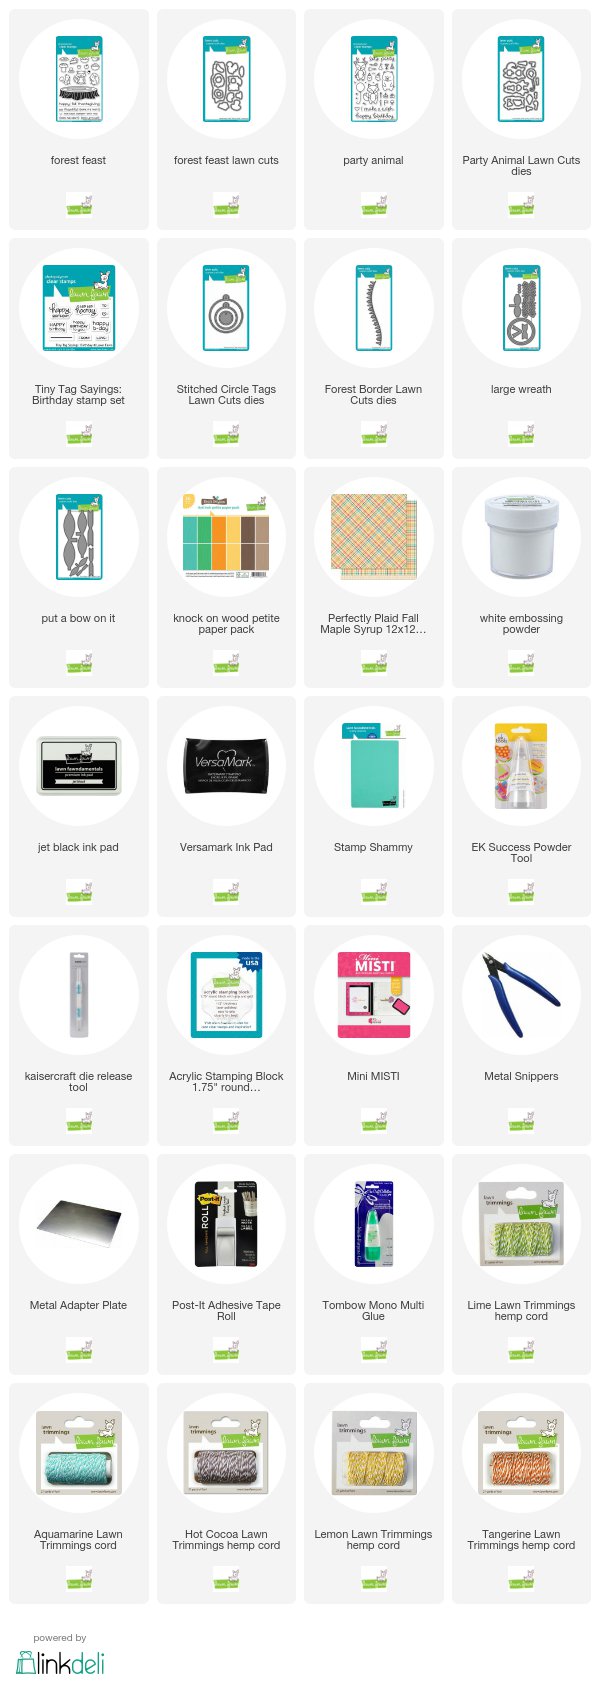
The concept for this card started with the three diagonal stripes in the sketch’s background. I wondered how I could use that visual in a new way. I still wanted stripes that extended from high on the right to low on the left, so the only way I could think of to change them was to curve them a little. That would turn them into a rainbow! Perfect!
Another thing I could change was the number of the stripes. I increased it from three to five, which gave me more room for more colors in my rainbow. I die cut them out of Spiffy Speckles patterned paper using the curviest of the Simple Stitched Hillside Borders. You could also use the Rainbow Lawn Cuts, but since I don’t have that one, I die cut each stripe twice to create the top and bottom. Then I used the Glue Tube to adhere the stripes to a pale aqua card base.

The next area that I wanted to switch up on the sketch was the circle in the center. The inside of the rainbow already made a curve that could represent the top of the circle, so I decided to loosely block off the bottom of the “circle” with a trio of Spring Showers clouds. It doesn’t quite make a circle, but the idea is there.
Now I needed some images to live in the scene I’d been creating. The unicorn and fairies from A Little Sparkle were the perfect fit! I colored them with Copic markers and trimmed them out with the matching dies. I added them to my scene, reserving one of the fairies and the wand for the top right corner where the hearts on the sketch would be.
For my sentiment, I decided to forgo the strip, and rather concentrate on the placement, so I stamped a greeting from Tiny Tags Sayings: Birthday on the largest cloud on the right in Merman ink. I also stamped a few “sparkle marks” in that ink and finished off the card with a scattering of tiny iridescent stars.
If you’d like to see how this card came together, you can check it out on my YouTube channel, Christy Gets Crafty. And if you haven’t entered our Sketch Challenge yet, you still have time! Hopefully I’ve inspired you to switch things up and interpret your card sketches in fun, new ways!
Thanks so much for stopping by!
Thank you so much, Christy! Your card is all kinds of magical!
The Card Sketch challenge will be open until Sunday, May 5th at 11:59PM ET so you will have plenty of time to join us! We are excited to see what you will create using Lawn Fawn products and the sketch!
 For each challenge, we will randomly select a winner to receive a $25.00 gift certificate to the
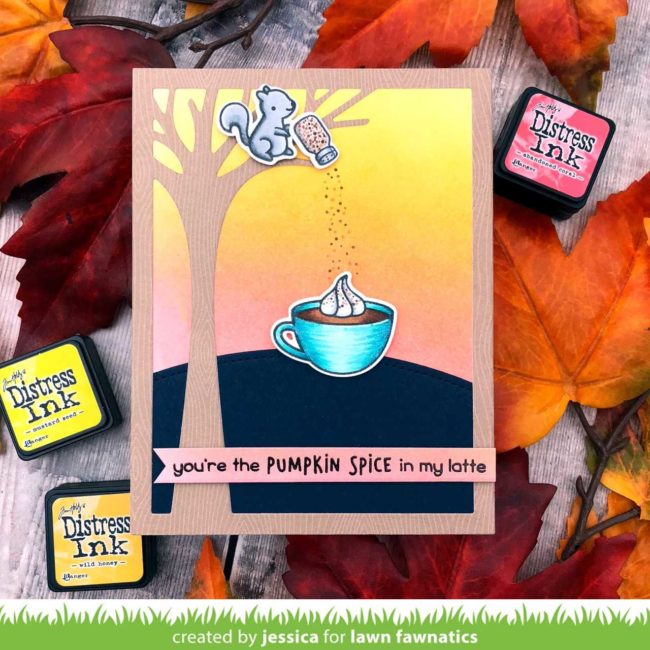 How cute is that squirrel adding
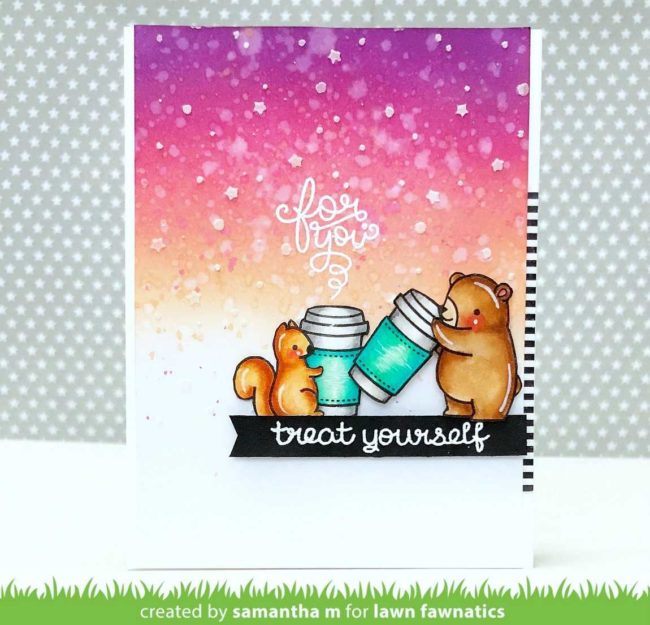
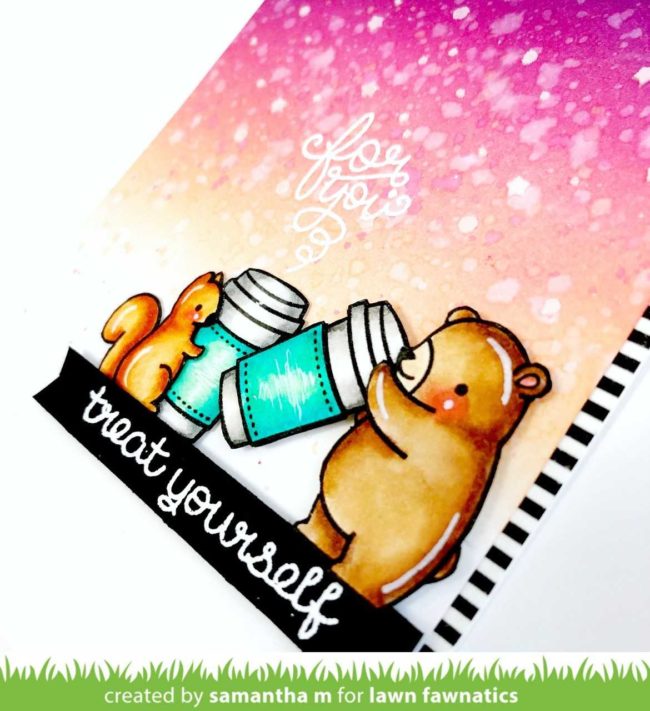 Cute critters are treating themselves to their favorite hot beverage on
  Our
Our 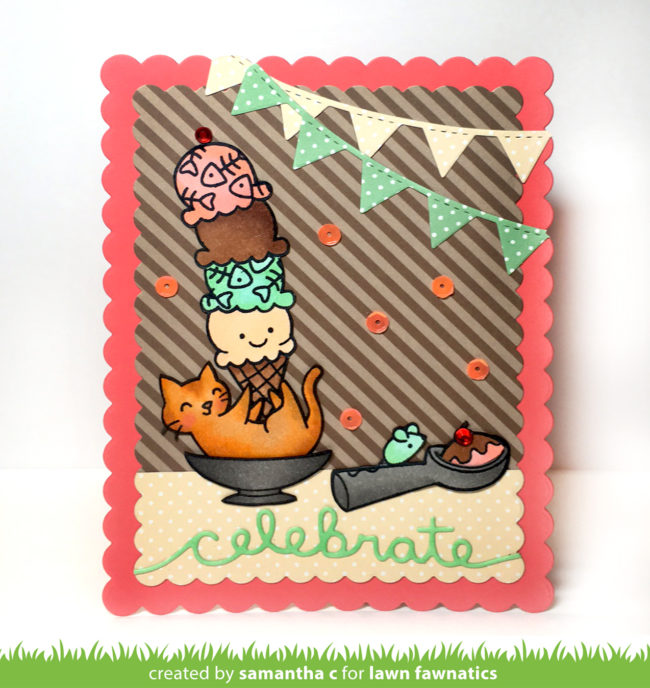

 Our
Our 
 I love little projects like this where I can use lots of different supplies! I started out with the larger